How to Configure a Mail Client with your Email Account
This procedure shows you how to configure your mail client to connect to your email account. The information you require can be found via your Client Area.
Before connecting your mail client to your email account, ensure you’ve created an email address (see How to Create and Manage Email Accounts).
- Viewing your email account information
- General Settings
- Add an email account to Apple Mail (Mac)
- Add an email account to Outlook
- Advanced Settings
Viewing your email account information
To retrieve your email account configuration information:
- Log in to your Client Area
- Click on Email from the left menu, then click Manage next to your email account

- Locate your email account, then click Connect Devices

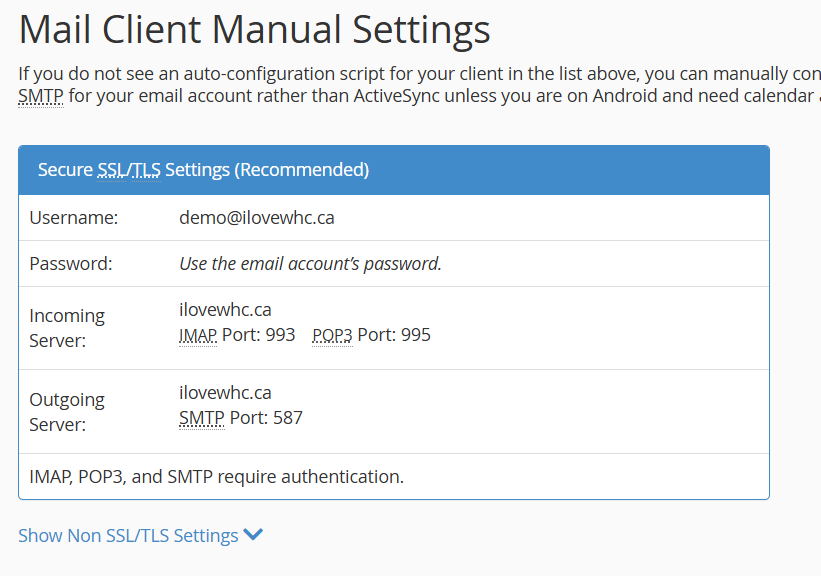
- Scroll down to Mail Client Manual Settings to find your port information
- Use this information when setting up your email on a new mail client
General Settings
If you can't access the interface to complete these steps, these are the typical settings you require:
|
Field |
Value |
|
Username |
Your email address |
|
Password |
Your email account's password |
|
Incoming Server |
mail.yourdomain.com |
|
IMAP (Incoming) Port |
993 |
|
Outgoing Server |
mail.yourdomain.com |
|
SMTP (Outgoing) Port |
587 |
* replace yourdomain.com with your own domain name.
Add an email account to Apple Mail (Mac)
Before you can add an email account to Apple Mail, make sure you have created your email account in cPanel. Please note the username and password of your email address. The username for your email is the full email address. The password is the one you entered when you created your account.
- To begin, click on the "Apple icon" at the top of your screen and select System Settings

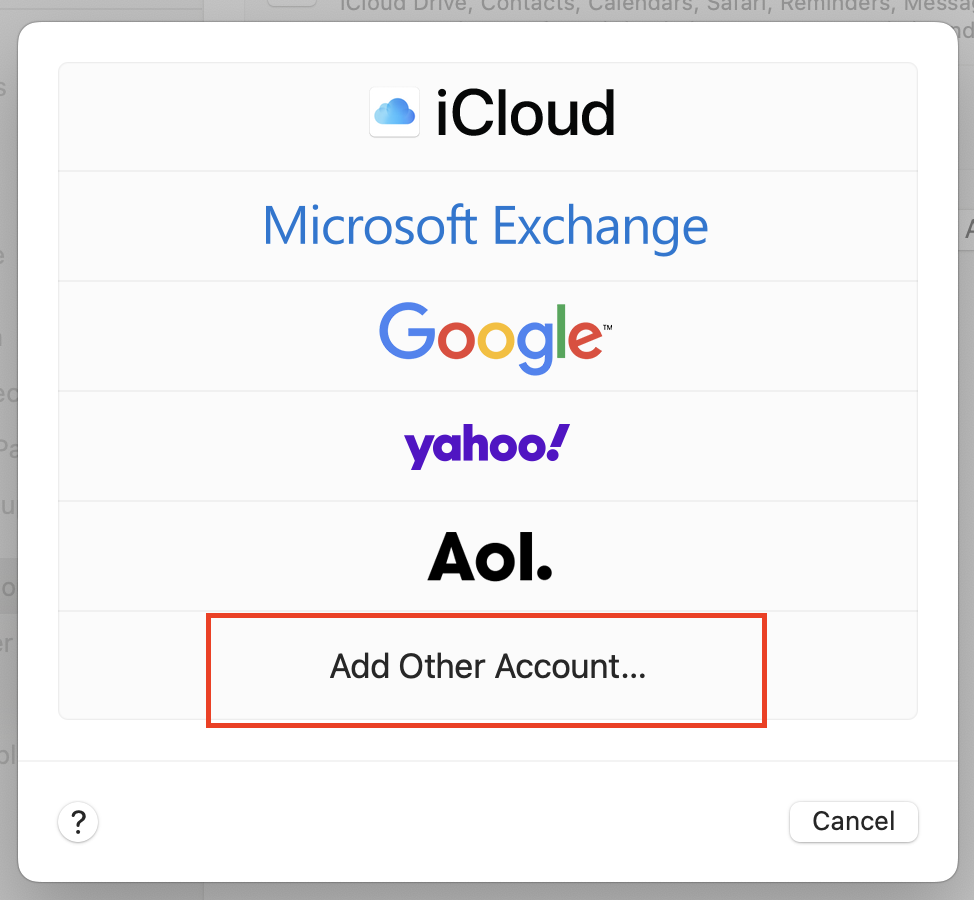
- Scroll down and click Internet Accounts from the left side menu, then click the Add Account button

- Click Add Other Account
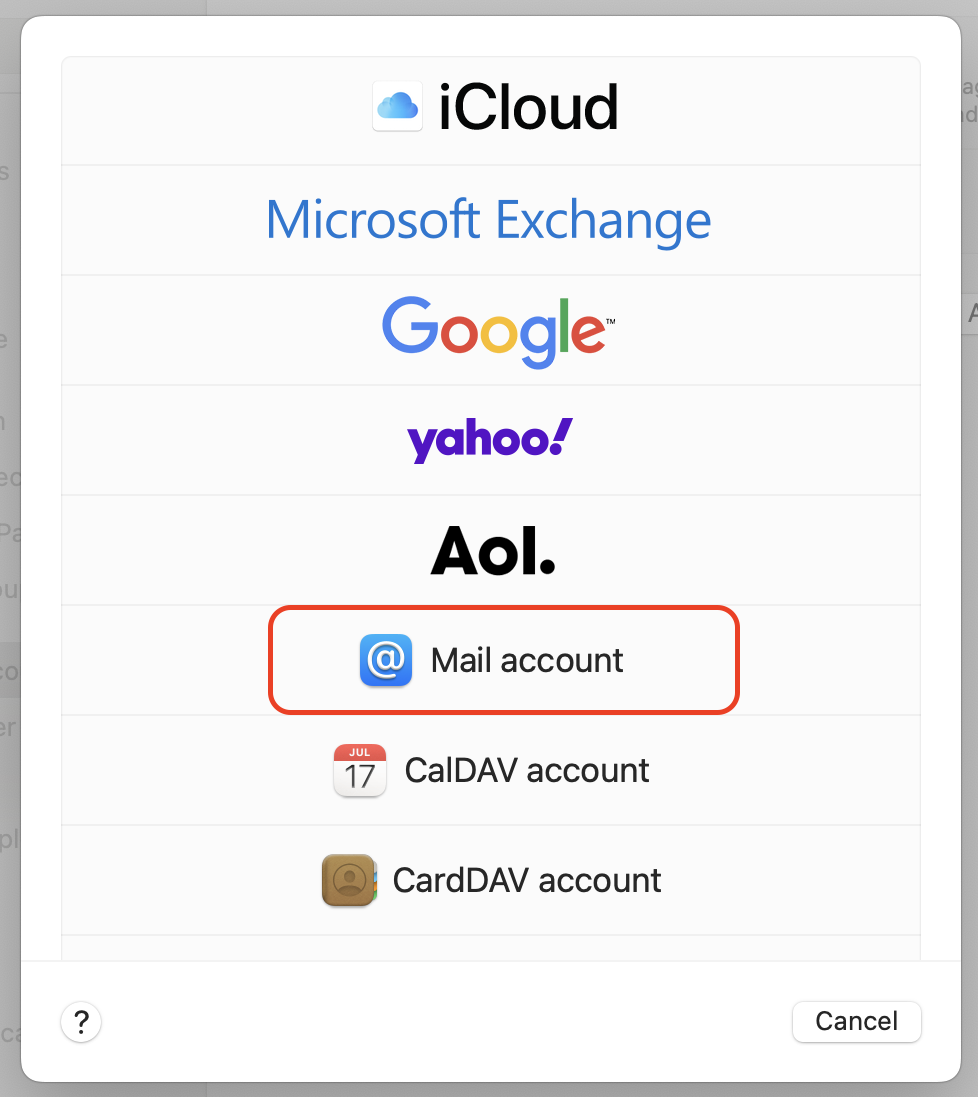
- Click Mail account
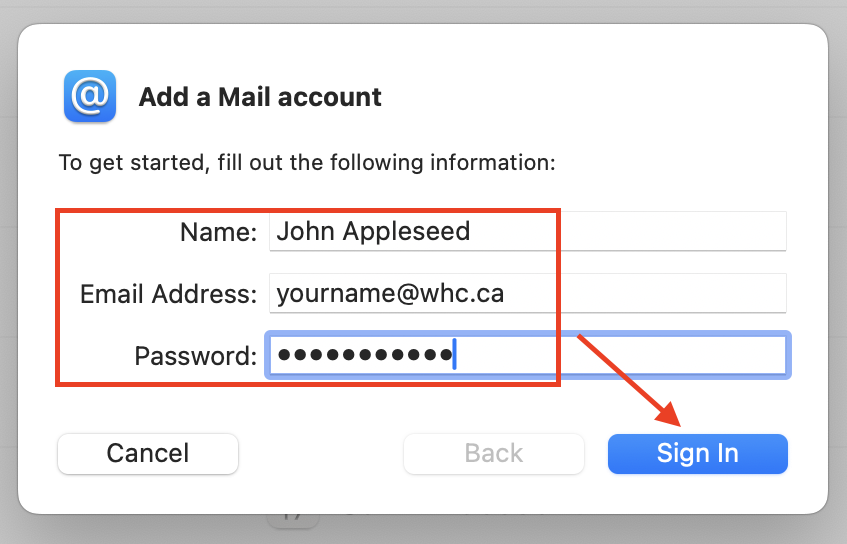
- Enter your Full Name, Email Address, and Password: (see here to find this information), then click Sign In
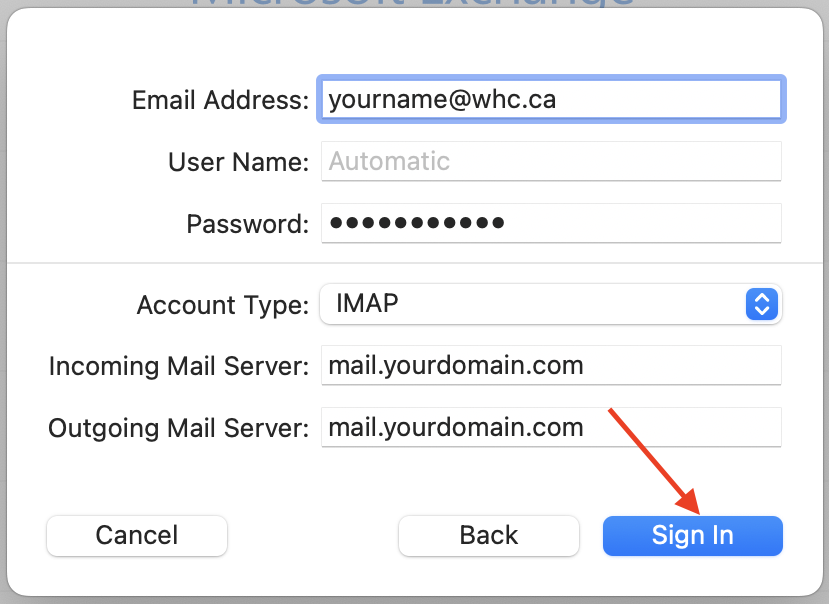
- Add your Email Address, Password, and under the Account Type (IMAP), add your Incoming and Outgoing Mail Server locations (e.g. mail.yourdomain.com). Then click on Sign In.
- Finally, you will be asked to choose which service you want to use with this account. Make your selection, then click on Done to confirm your changes

- You can now use Apple Mail with your email account!
Add an email account to Outlook
Outlook is the email tool included with Microsoft’s Office 365 Productivity suite, and can be easily configured to work with your WHC email accounts.
Before starting, please make sure you have Outlook installed, and that you have created an email account with WHC.
- Open Outlook
- Click the View tab, then View settings
- Select Accounts, then Email accounts

- Select Add Account, and enter your email address, then click Continue

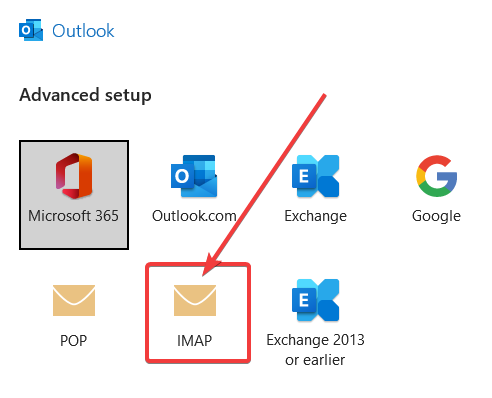
- Under Advanced options, check Let me set up my account manually
- Click Connect
- Choose account type IMAP
- You’ll now be prompted to provide your server configuration, where you have to enter the following information:
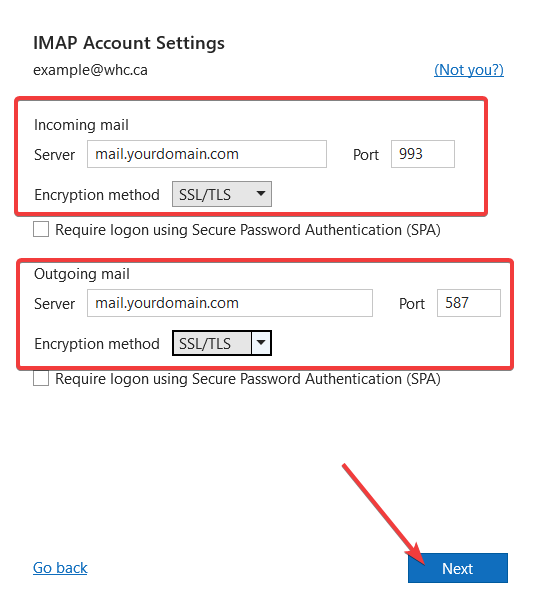
- Incoming mail:
- Server: mail.yourdomain.com (replace yourdomain.com with your domain name)
- IMAP port: 993
- Encryption method: SSL/TLS
- Outgoing mail
- Server: mail.yourdomain.com (replace yourdomain.com with your domain name)
- SMTP Port: 587
- Encryption method: SSL/TLS
- Incoming mail:
- When you're done, click Next
- Enter the password for your account
- Click Connect
- Your email account is now added to Outlook!
Advanced Settings
These settings are needed only if you are experiencing issues with the default settings:
- Authentication: If available, enable the authentication process when sending messages, using the same username and password as for incoming messages.
- SSL/TLS: leave disabled (if you would like to enable this option, you will need to install an SSL certificate on your account).
- If you’re using an external DNS provider, ensure that the highest priority MX record is set to your permanent WHC host (e.g. yourdomain.mywhc.ca) with your DNS provider.
It is important to test the sending and receiving of emails in your mail client, to detect any configuration errors. If you face problems with your mail accounts and are unable to send or receive emails, please contact us for assistance.
