How to Connect Your WHC Domain to Wix
Introduction
If you’ve chosen to host your website on Wix and need to connect your WHC domain, this guide will provide the necessary steps to do so. We’ll walk you through the available methods—whether it's using nameservers or manually updating DNS records—so you can complete the connection efficiently.
- Step 1: Access Your Domain Management
- Step 2: Get DNS Records from Wix
- Step 3: Choose a Connection Method
- Step 4: Update DNS Settings in WHC
- Step 5: Verify DNS Configuration
- Step 6: Complete the Domain Connection
- Step 7: Test and Monitor
- Troubleshooting Tips
Step 1: Access Your Domain Management
- Log in to your WHC Client Area.
- Go to Domains > My Domains from the left panel.
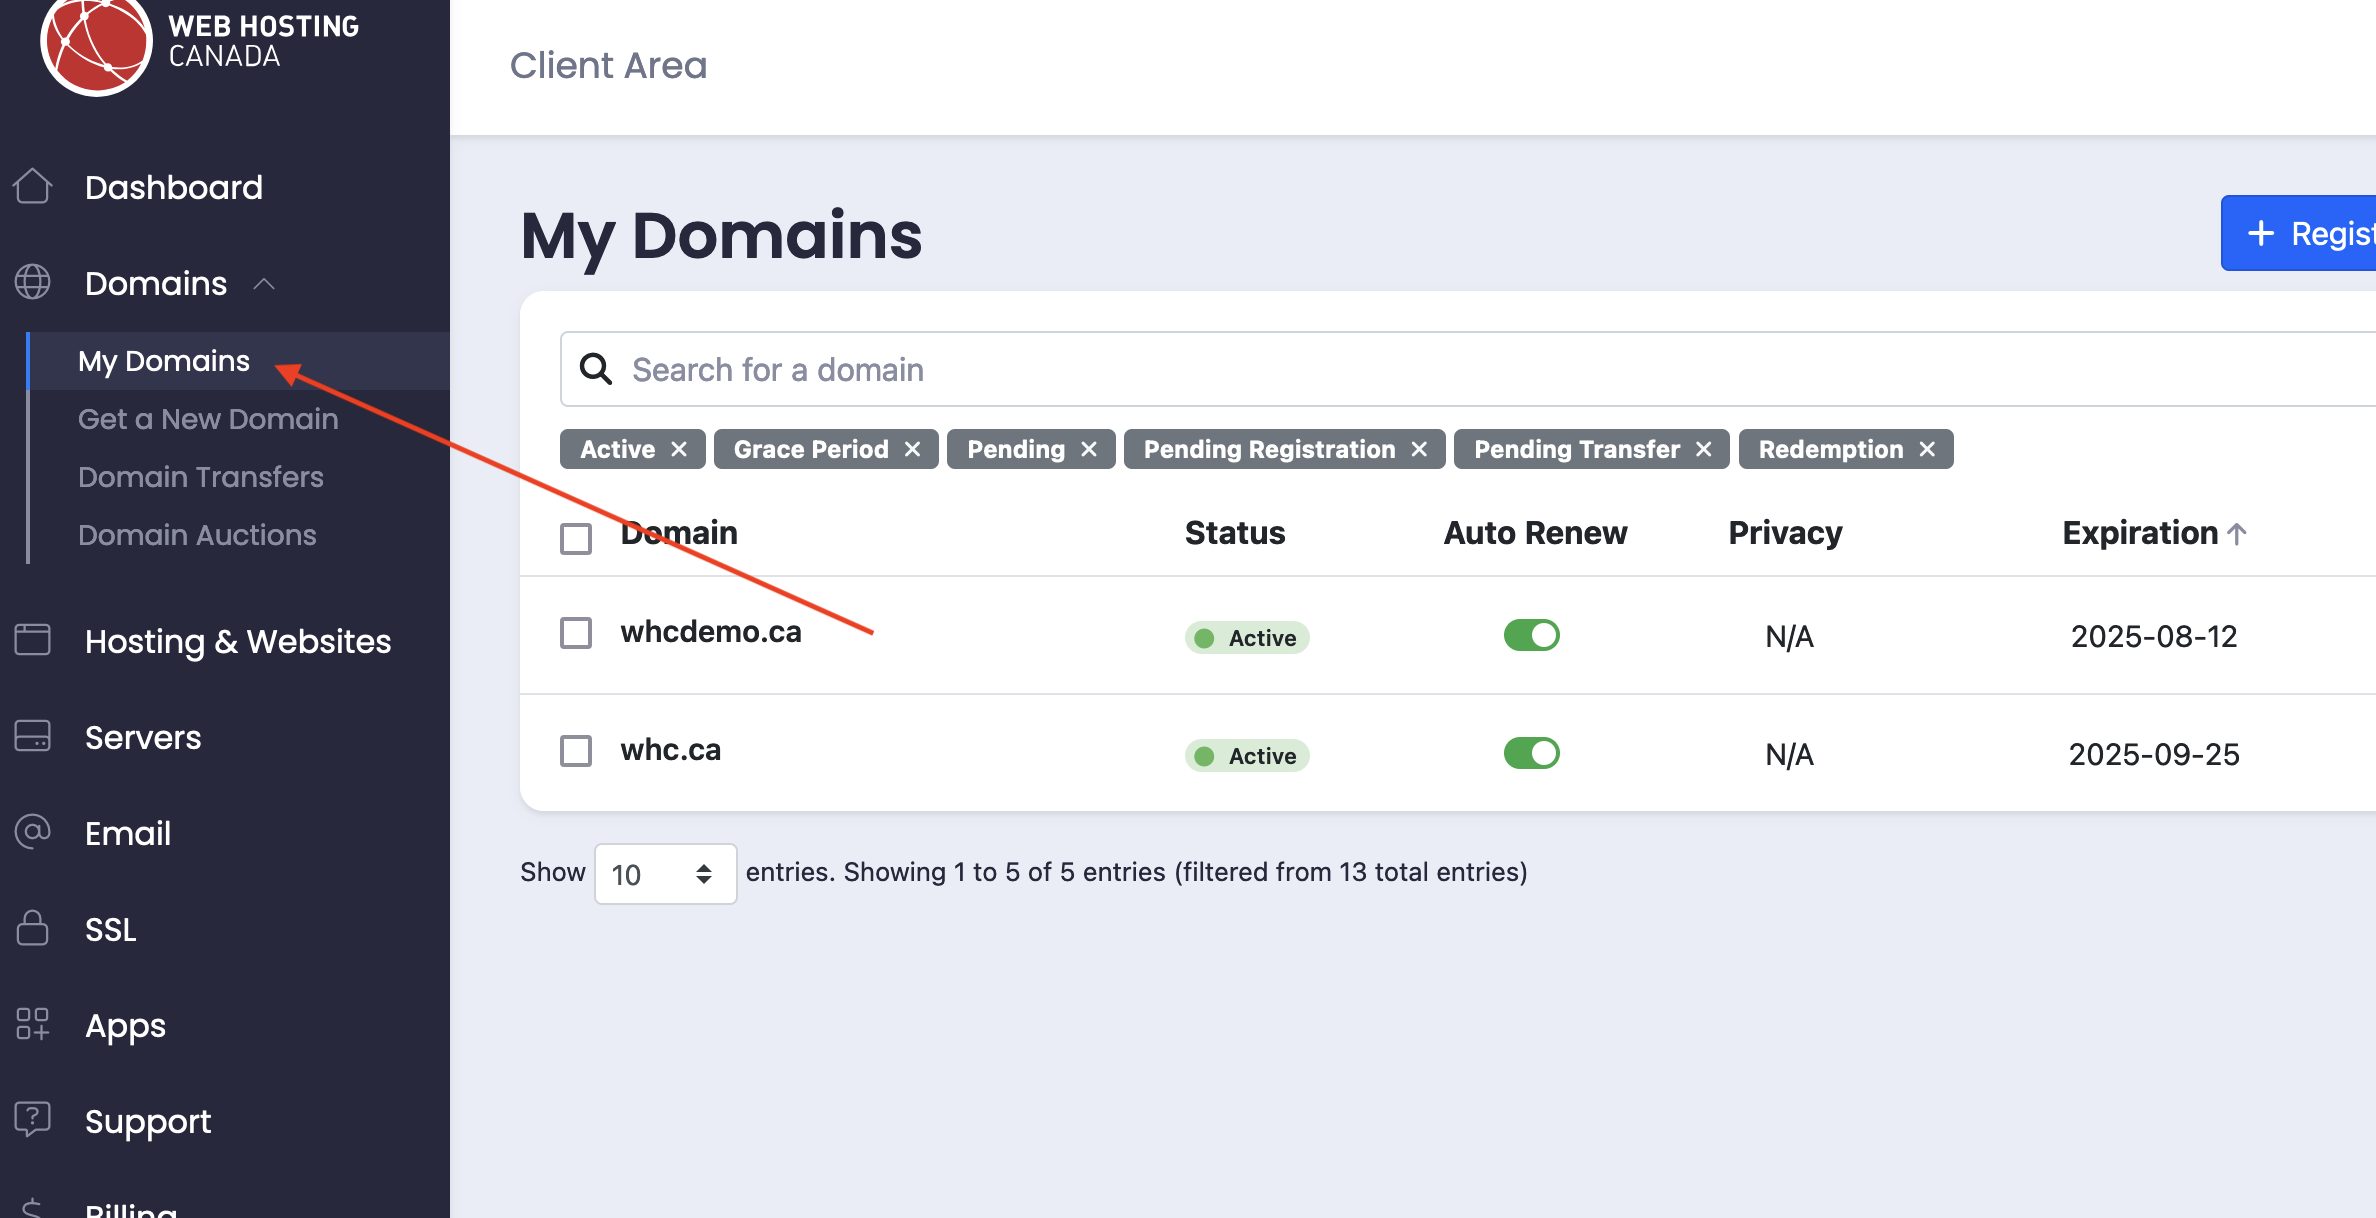
- Select the domain you want to connect to Wix and click Manage.
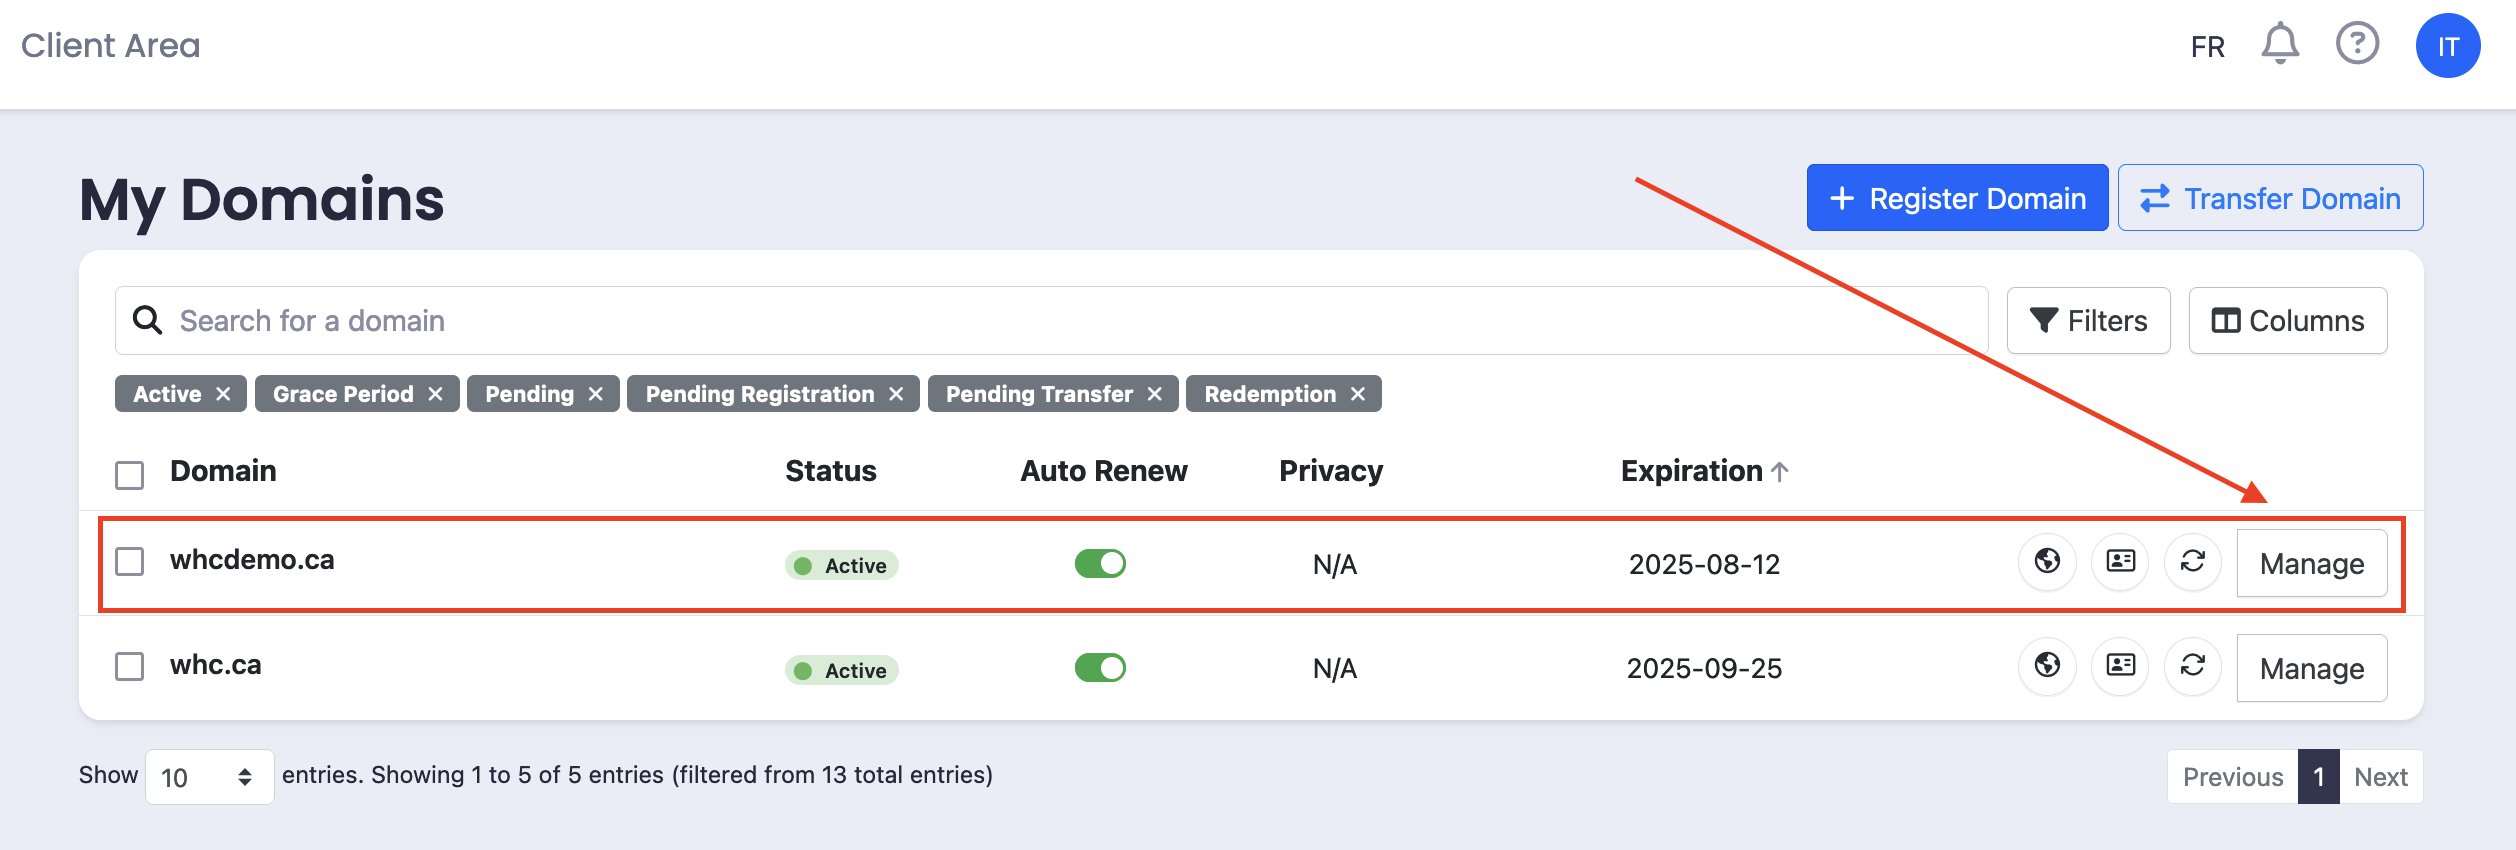
- Leave this window open, as we will need it in the next steps.
Step 2: Get DNS Records from Wix
- Log in to your Wix account.
- Go to Domains and choose Connect a domain you already own.
You can refer to this article from the Wix Help Center for more information about this step.
Step 3: Choose a Connection Method
Option 1: Nameservers Connection (Recommended)
This method lets Wix manage your DNS settings automatically, ensuring full compatibility with all Wix features.
Important
If you decide to chose this method, please note that the emails associated with your domain name might stop working. Make sure to configure your MX records on Wix’s DNS management interface before making the nameservers switch. You can contact our support if you need further assistance.
Option 2: Pointing (Advanced Users)
This method allows you to manually configure your DNS settings. Choose this if you want to manage DNS settings yourself.
Step 4: Update DNS Settings in WHC
Follow the steps below based on your chosen connection method from the previous step.
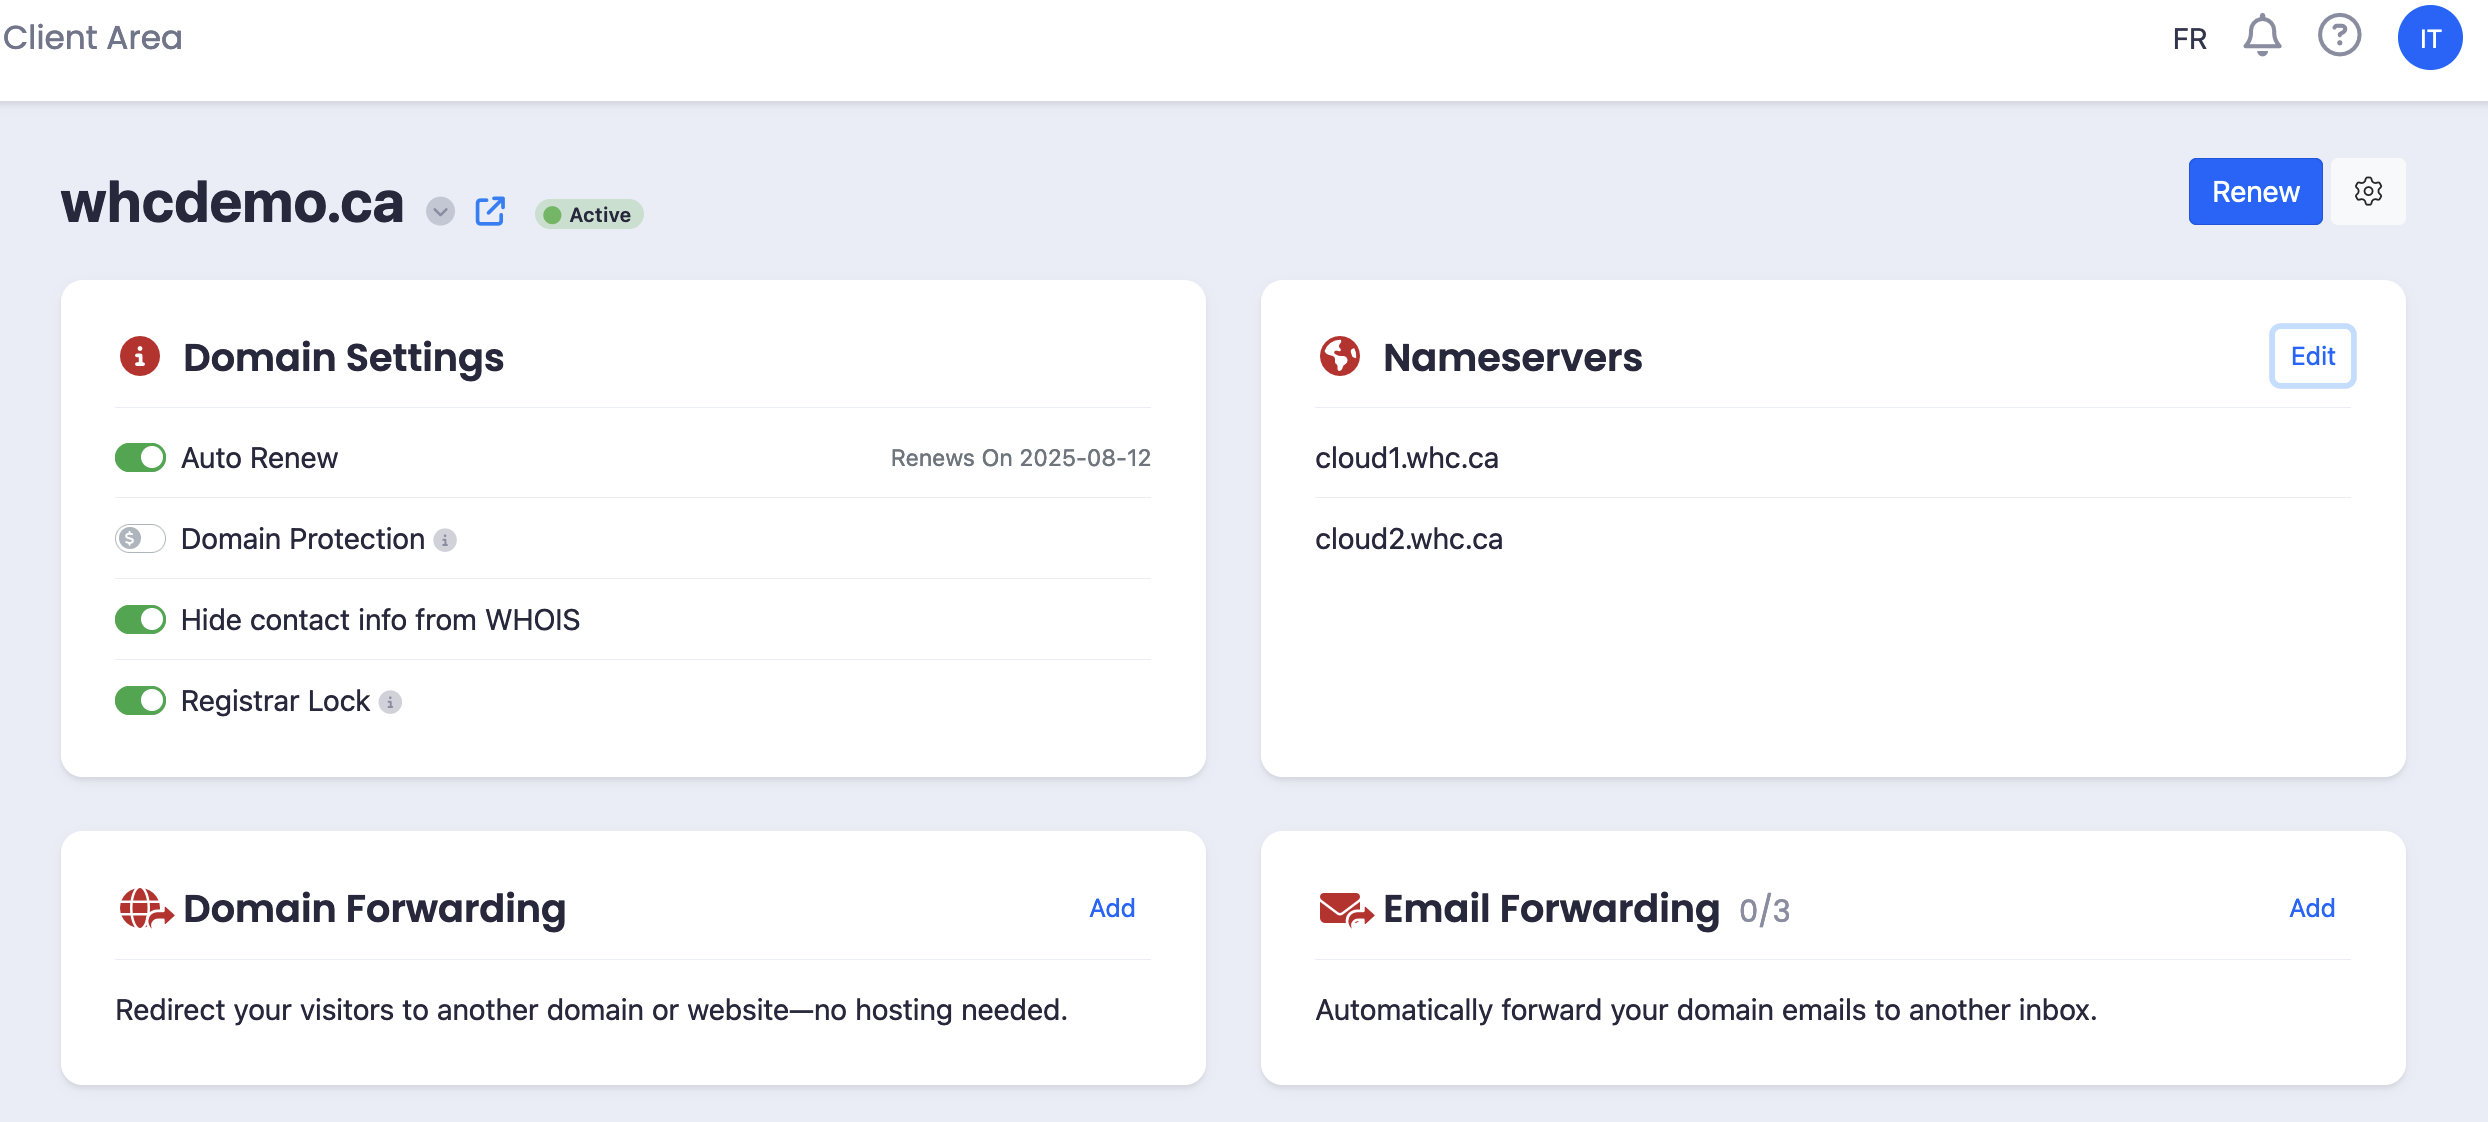
Nameservers Connection Method
This step assumes that you are already connected to your domain management in your Client Area. If you’re not logged in to your account, please go back to Step 1.
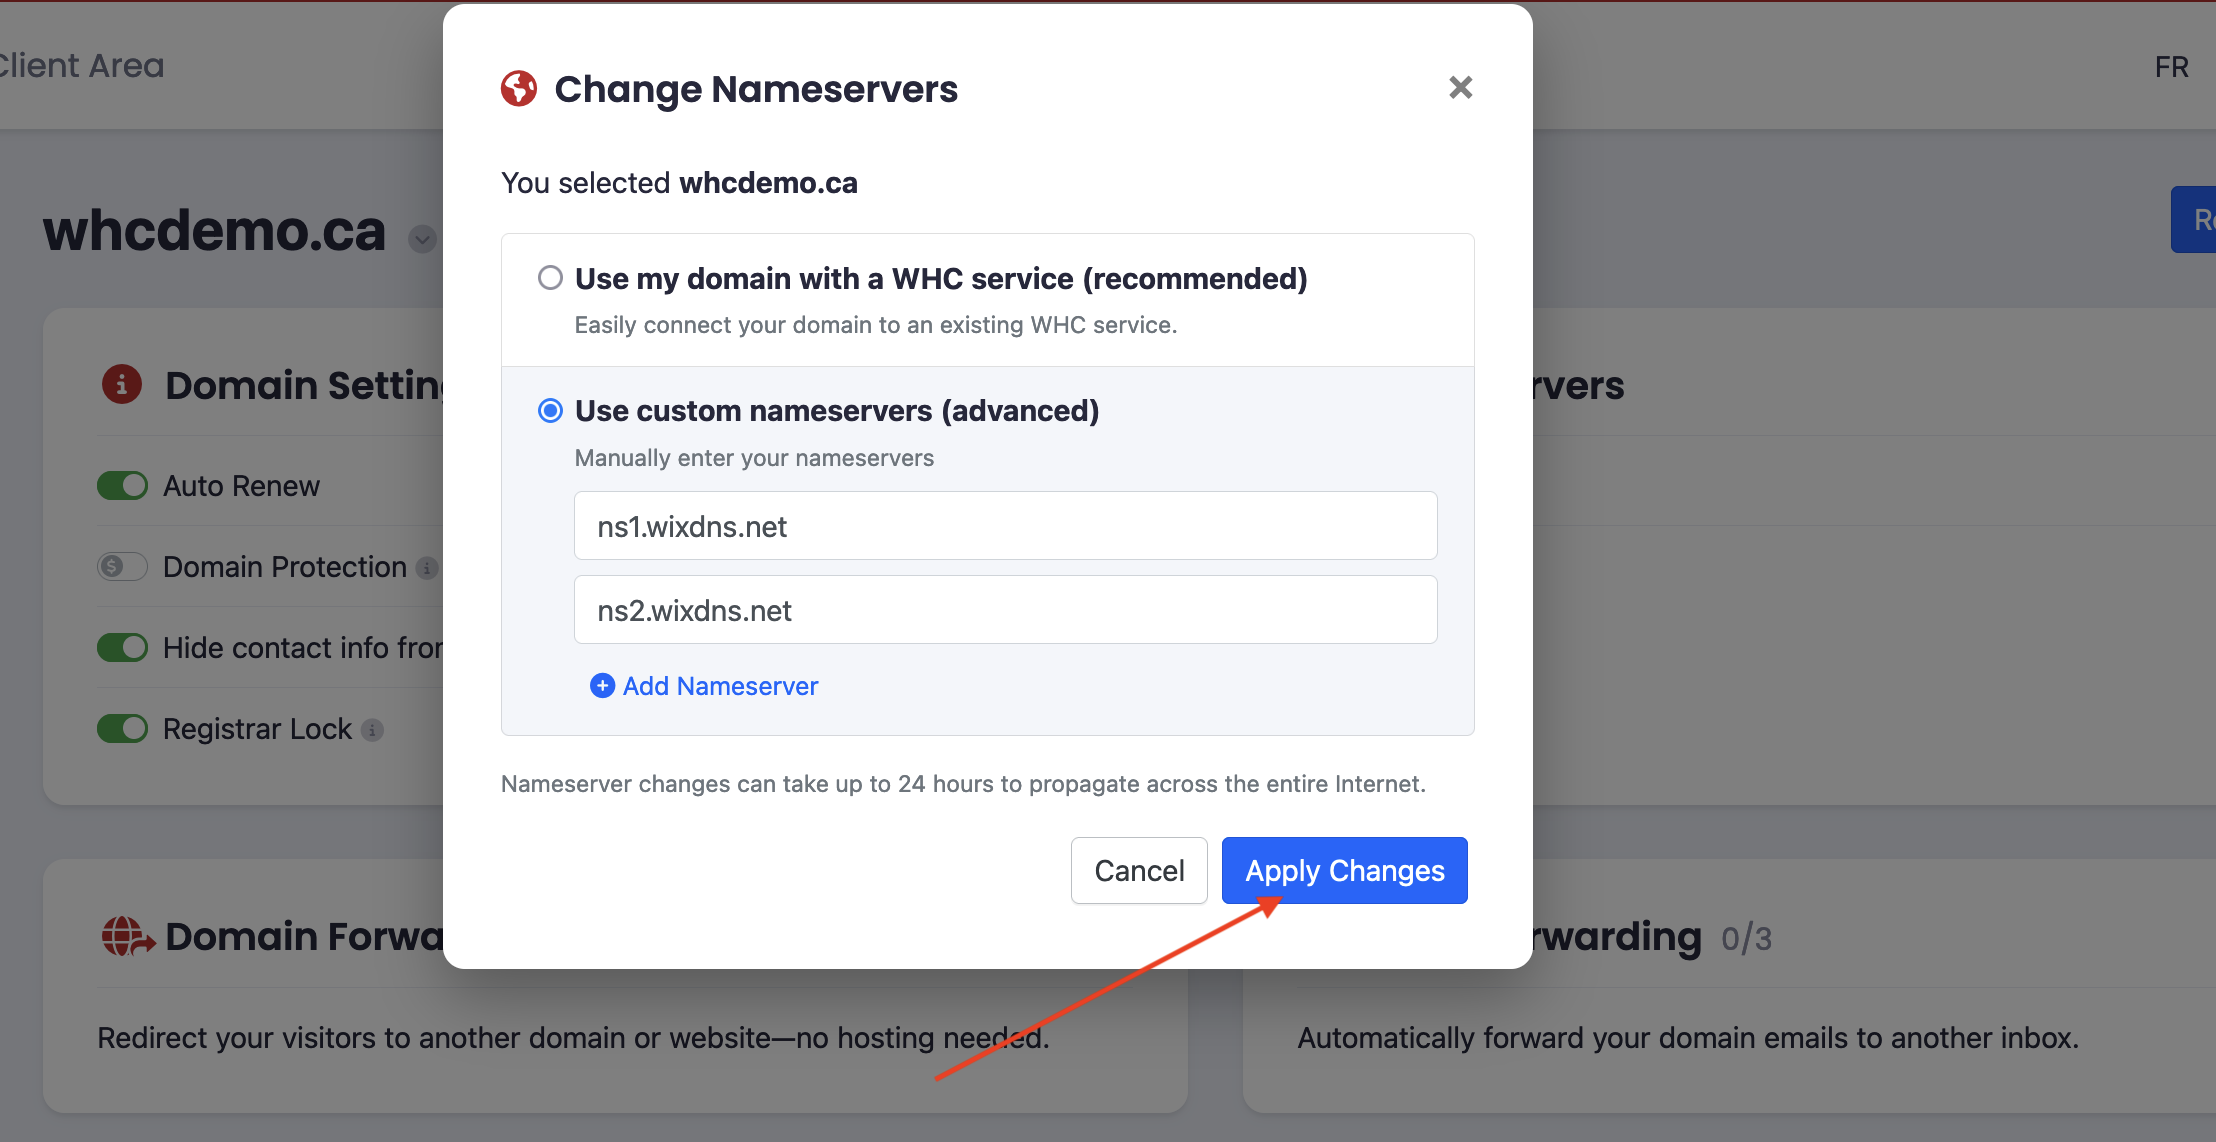
- Click on Edit from the Nameservers section.
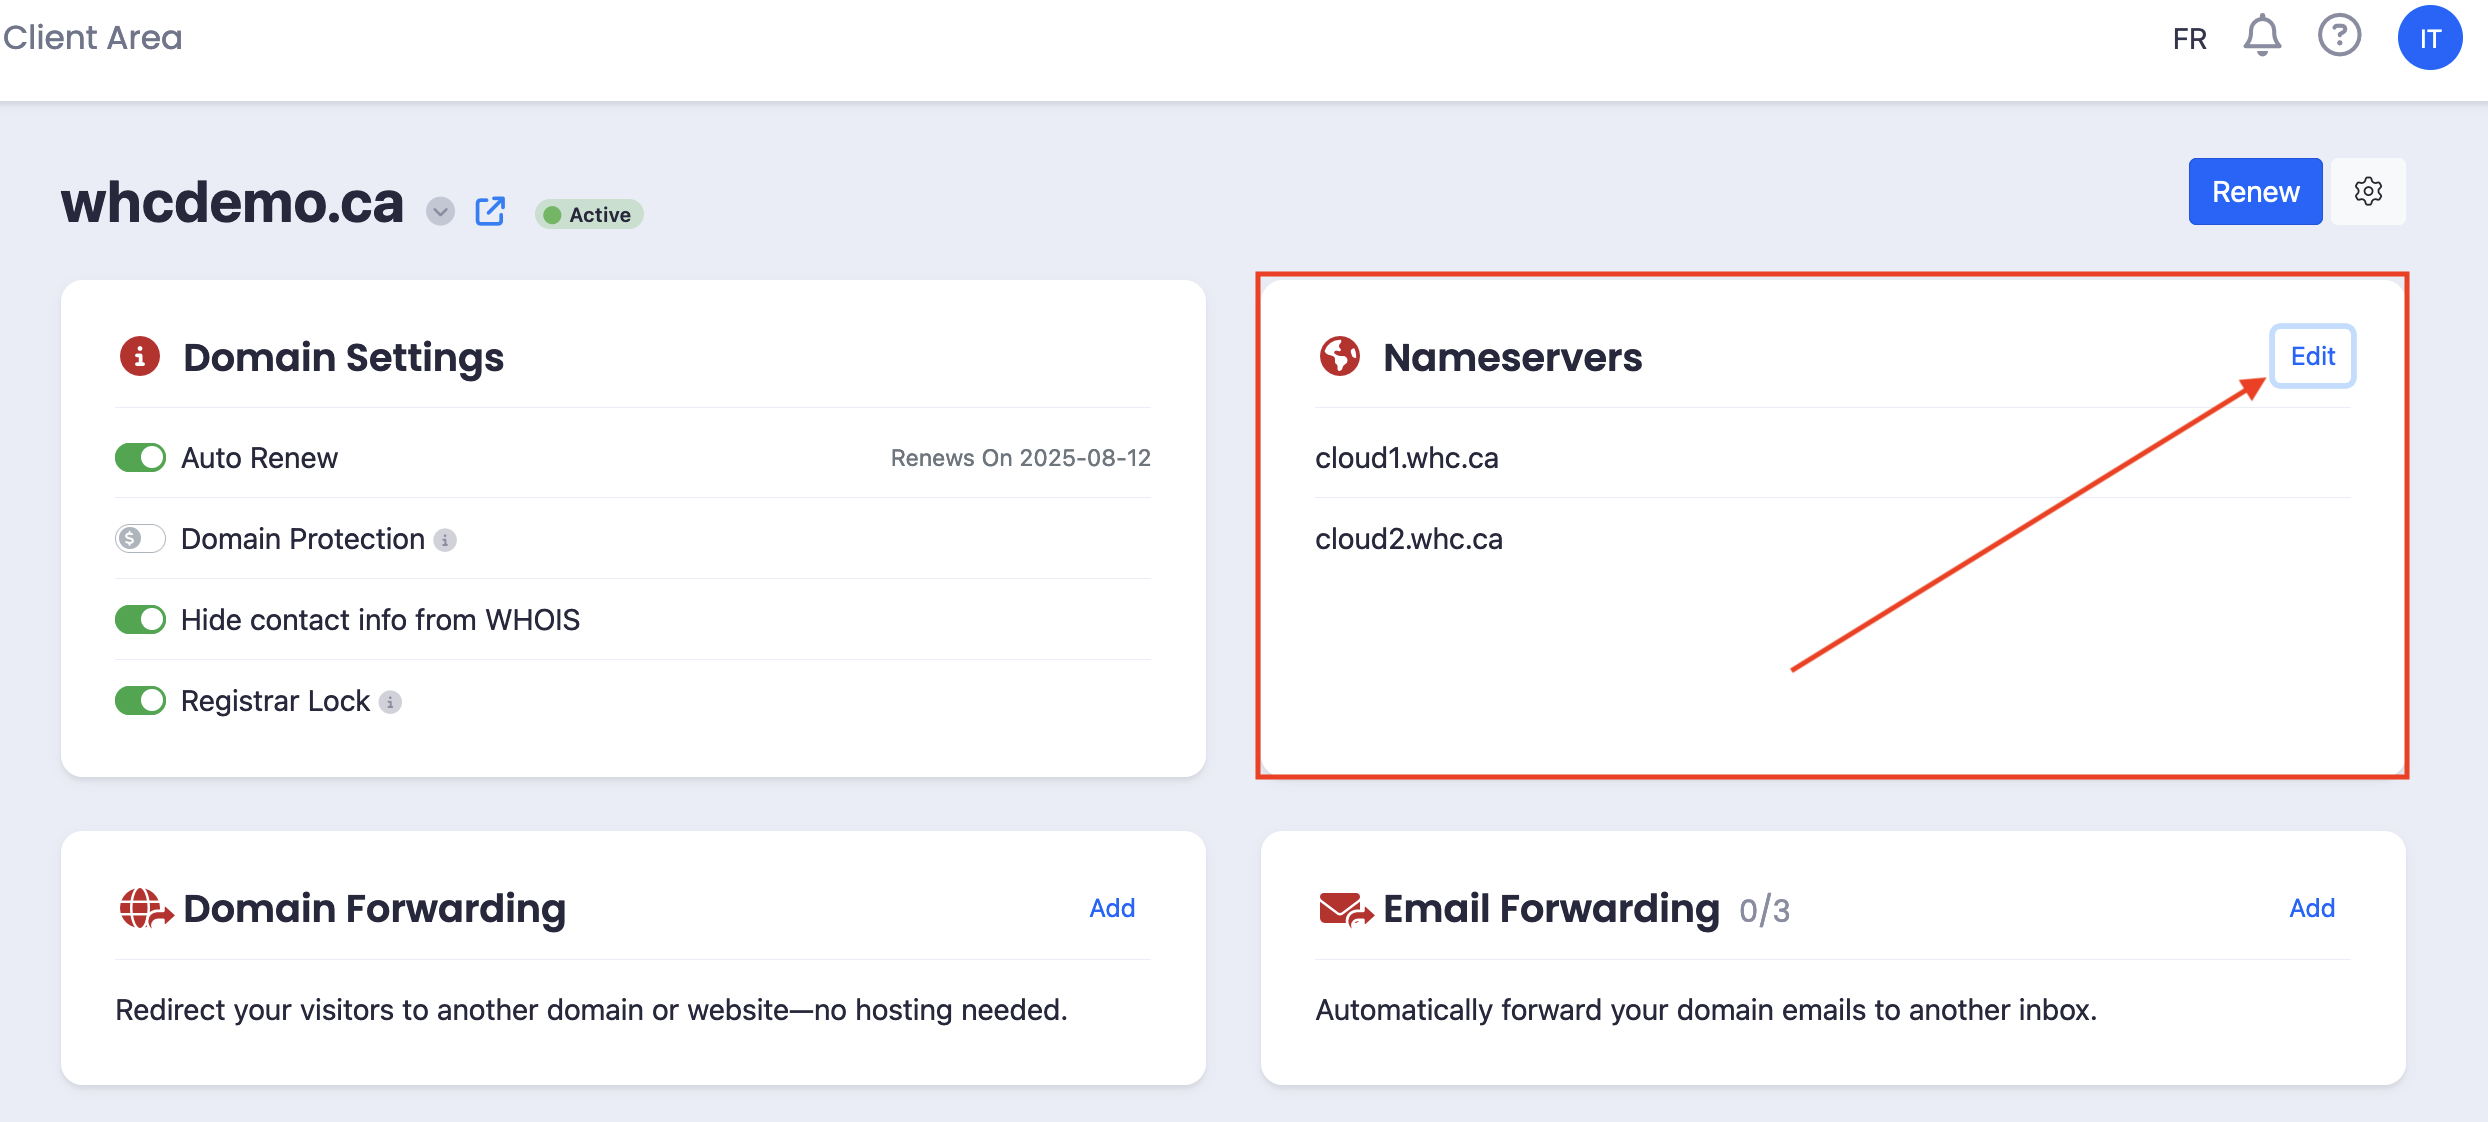
- Select the option Use custom nameservers (advanced) and Enter the nameservers provided by Wix from Step 2.
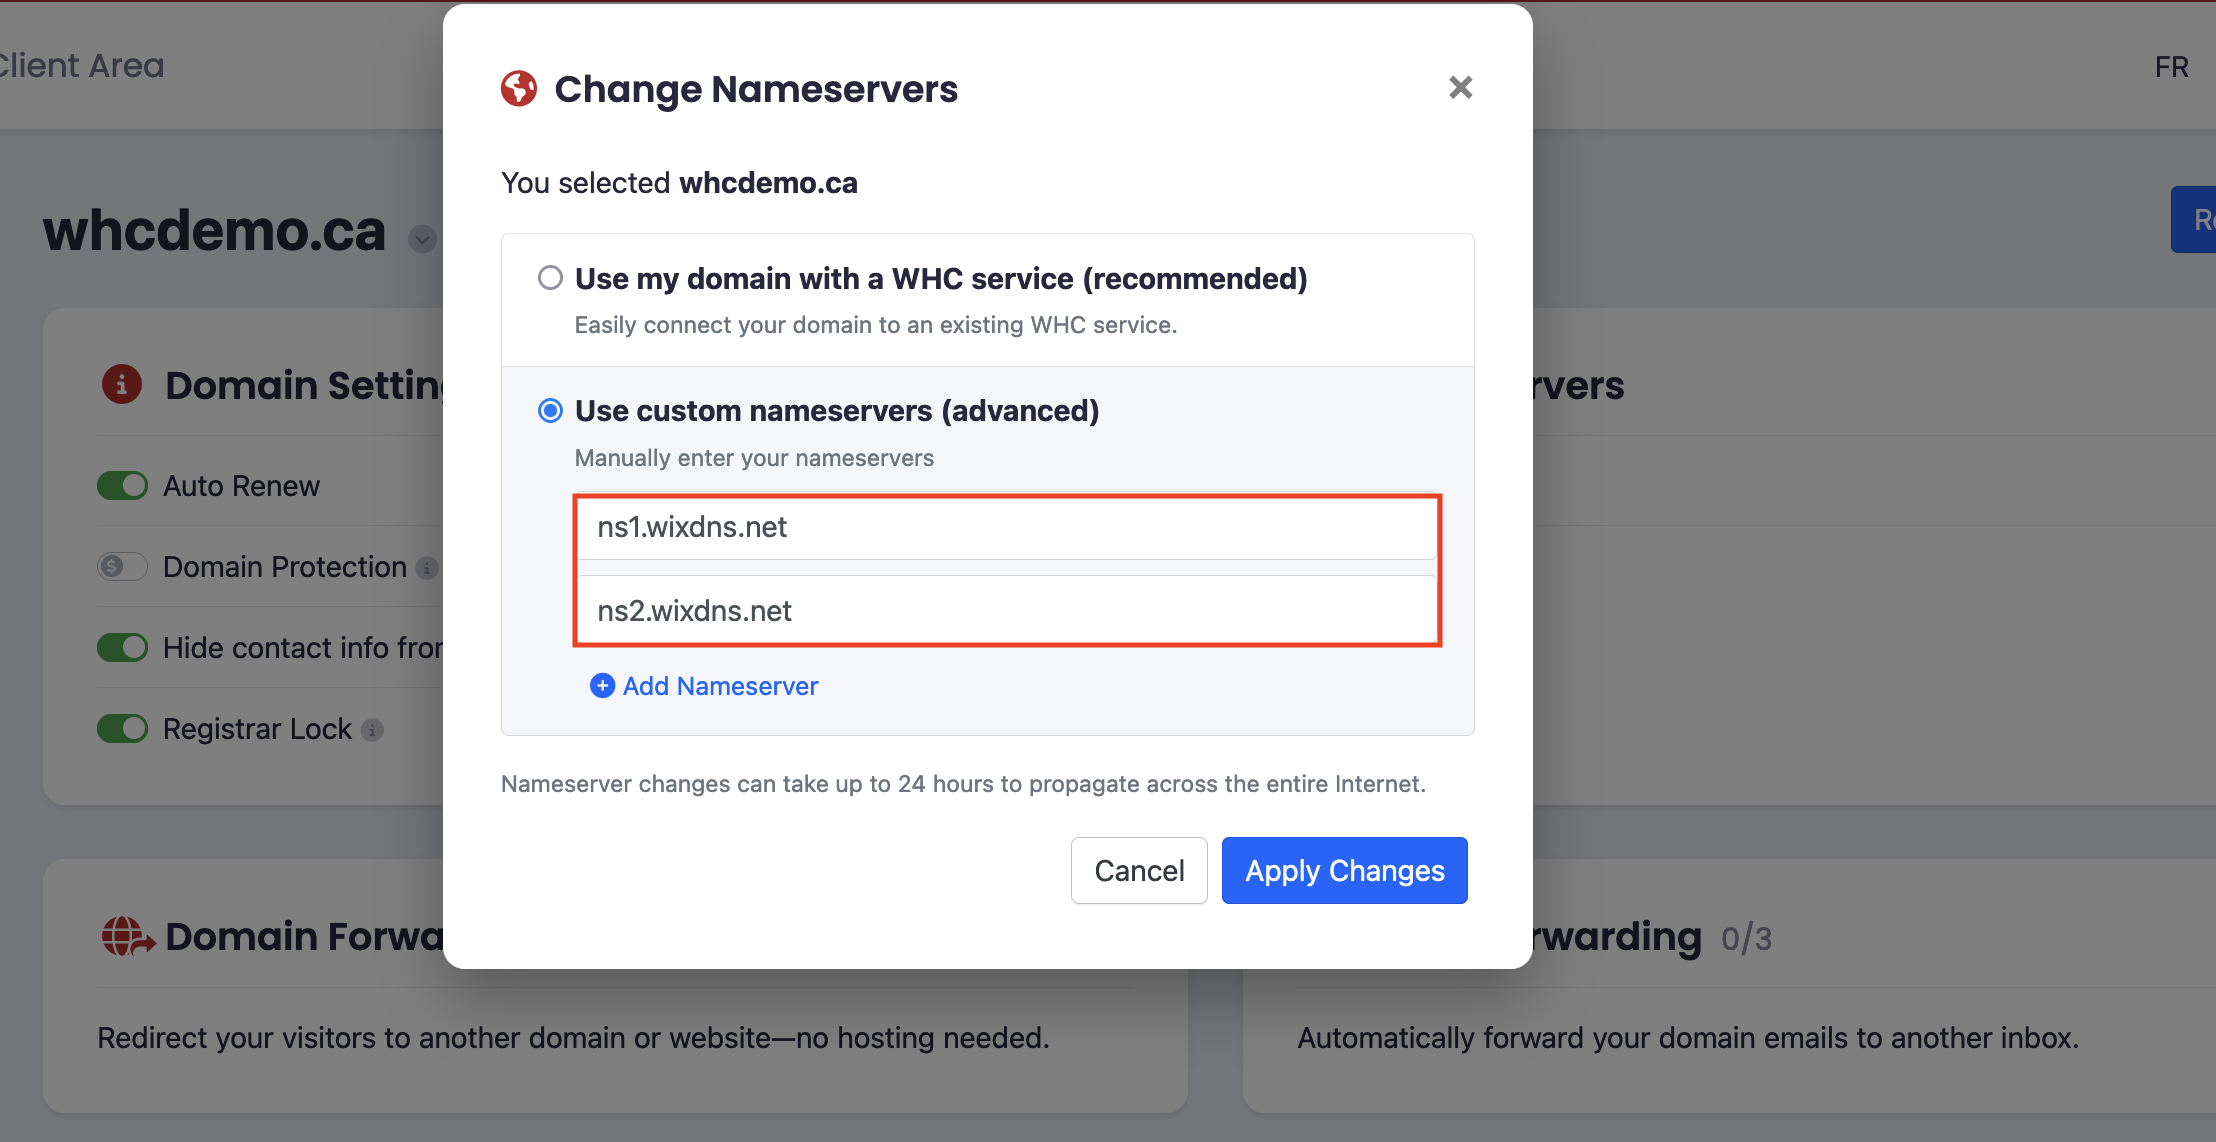
- Click on Apply Changes.
Pointing (Manual DNS)
If your domain is using WHC nameservers, then all you have to do is to update the adequate DNS records listed below:
- CNAME Record: Point the www record to www123.wixdns.net (replace 123 with the unique number provided by Wix in Step 2).
- A Record: Update the A record to point to the IP address provided by Wix in Step 2.
Tip
You can refer to this guide for the steps on how to make these changes.Step 5: Verify DNS Configuration
- Return to your Wix account.
- Click Verify in the Domain connection section.
- Wix will automatically check if the DNS settings are correct.
Step 6: Complete the Domain Connection
- In your Wix dashboard, confirm the connection of your domain.
- Follow any additional instructions provided by Wix to finalize the setup.
Step 7: Test and Monitor
Once your DNS changes have propagated, it’s time to check your domain. Open your browser and enter your domain name to confirm it directs to your Wix website. Keep in mind that DNS changes may take up to 48 hours to fully propagate, during which time your site may experience intermittent availability.
Troubleshooting Tips
- Double-check your DNS records for any errors or typos.
- Be patient, as DNS propagation can take time.
- If you encounter any issues, contact our support team for further assistance.
