How to Create a Support Ticket
Getting Started
Creating a support ticket is a crucial step in getting assistance with any issues or questions you might have. Whether you're facing technical difficulties, have a billing or sales inquiry, or need help navigating our services, our support team is here to help. By submitting a support ticket, you ensure that your issue is logged, tracked, and addressed in a timely manner. This article will guide you through the process of creating a support ticket, ensuring you provide all the necessary information for a swift resolution. Follow the steps below to get the help you need quickly and efficiently.
Steps to Create a Support Ticket
From the Client Area
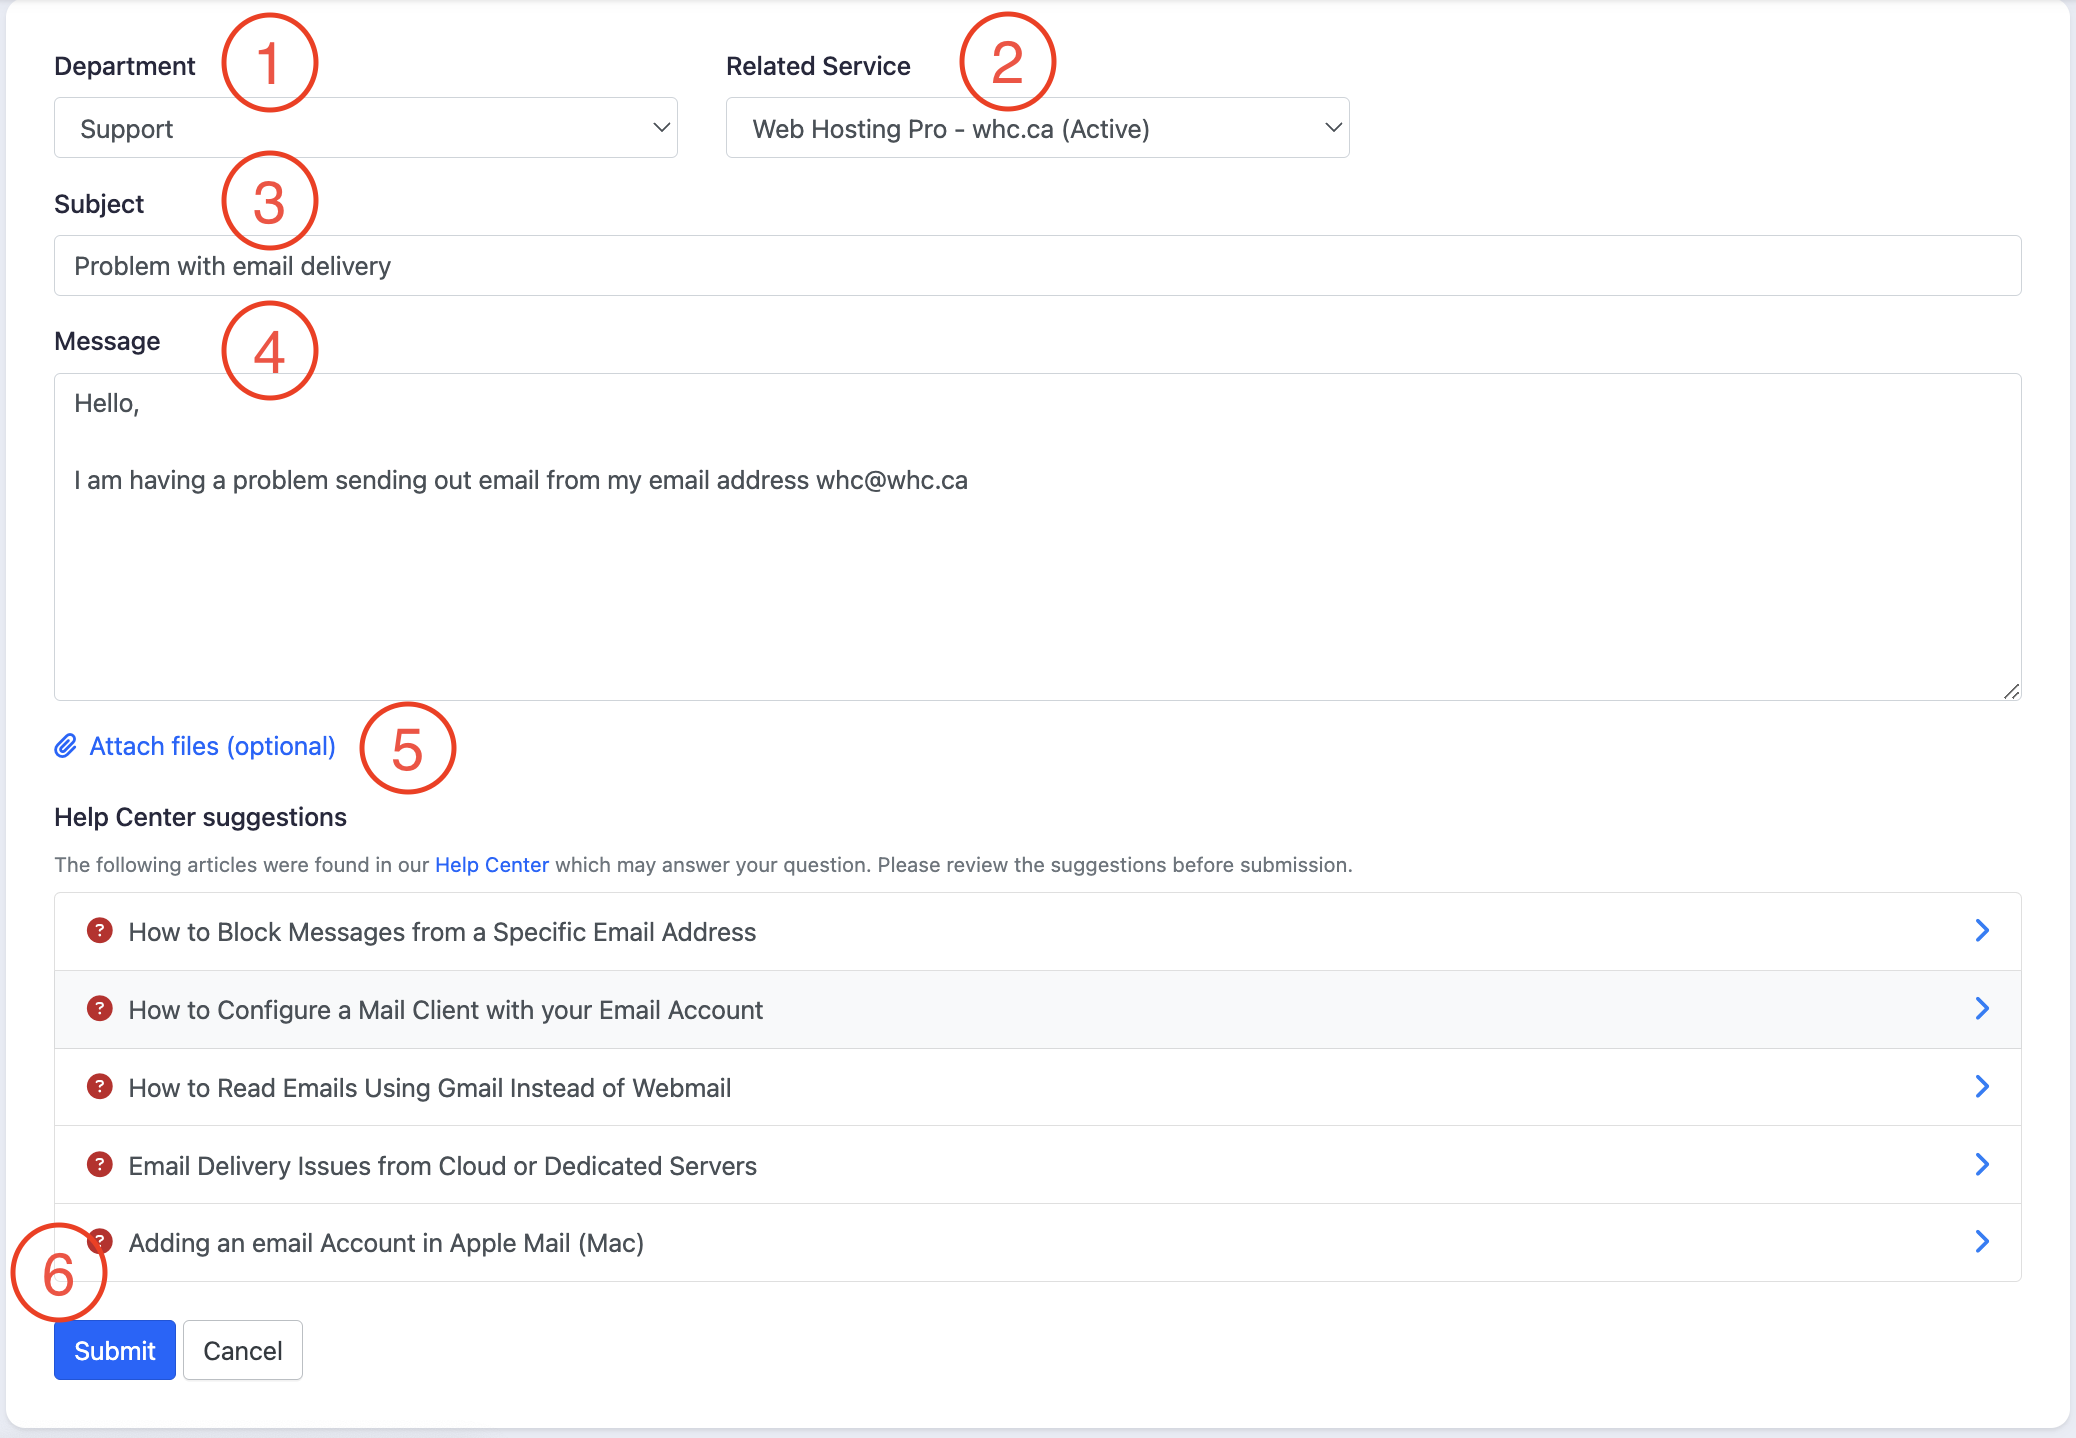
- Navigate to create a ticket page from the Client Area.
- Tell us about the problem you are experiencing
- Department: Select the department from the dropdown menu, depending on your request.
- Related Service: Select the service or domain related to your inquiry from the dropdown menu. If your request is not related to any of your existing services or domains, select “None”.
- Subject: Give a brief, clear title for your issue.
- Message: Explain what's going wrong. Include details like error messages, what you were doing when it happened, and any steps you’ve already taken to fix it.
- Attachments: Upload any screenshots or files that might help us understand the problem better by clicking on Attach Files.
- Double-check that everything is filled out correctly.
- Click Submit once done.
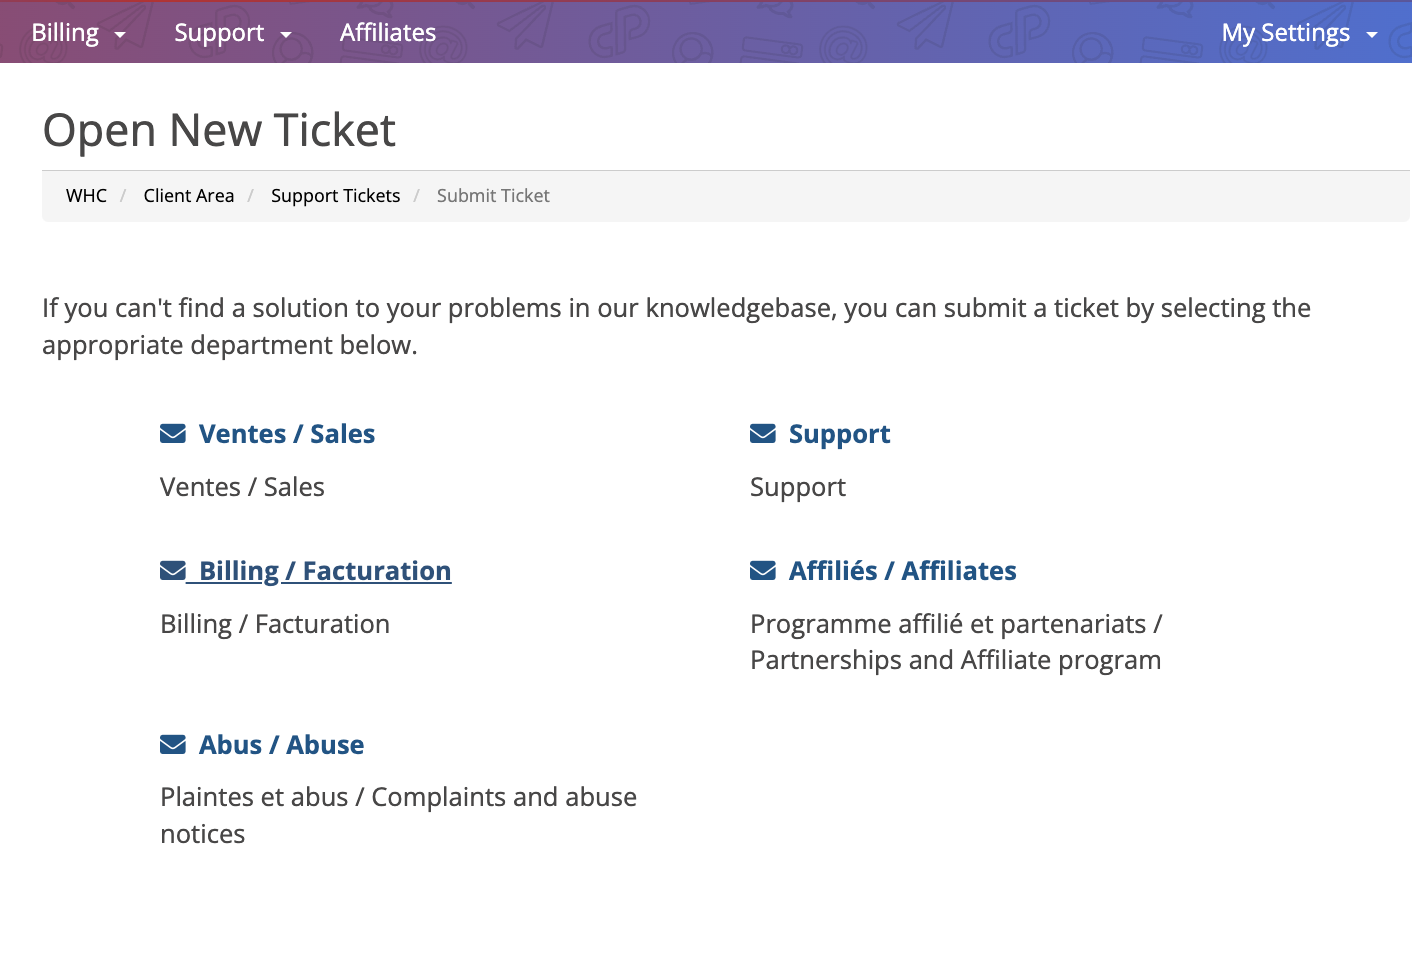
From the Classic Client Area
- Navigate to the Open New Ticket page.
- Select the department depending on your request.
- Tell us about the problem you are experiencing
- Subject: Give a brief, clear title for your issue.
- Department: You can change the department from the dropdown menu in case you select the wrong department from the previous step.
- Related Service: Select the service or domain related to your inquiry from the dropdown menu. If your request is not related to any of your existing services or domains, select “None”.
- Message: Explain what's going wrong. Include details like error messages, what you were doing when it happened, and any steps you’ve already taken to fix it.
- Attachments: Upload any screenshots or files that might help us understand the problem better from Attachments.
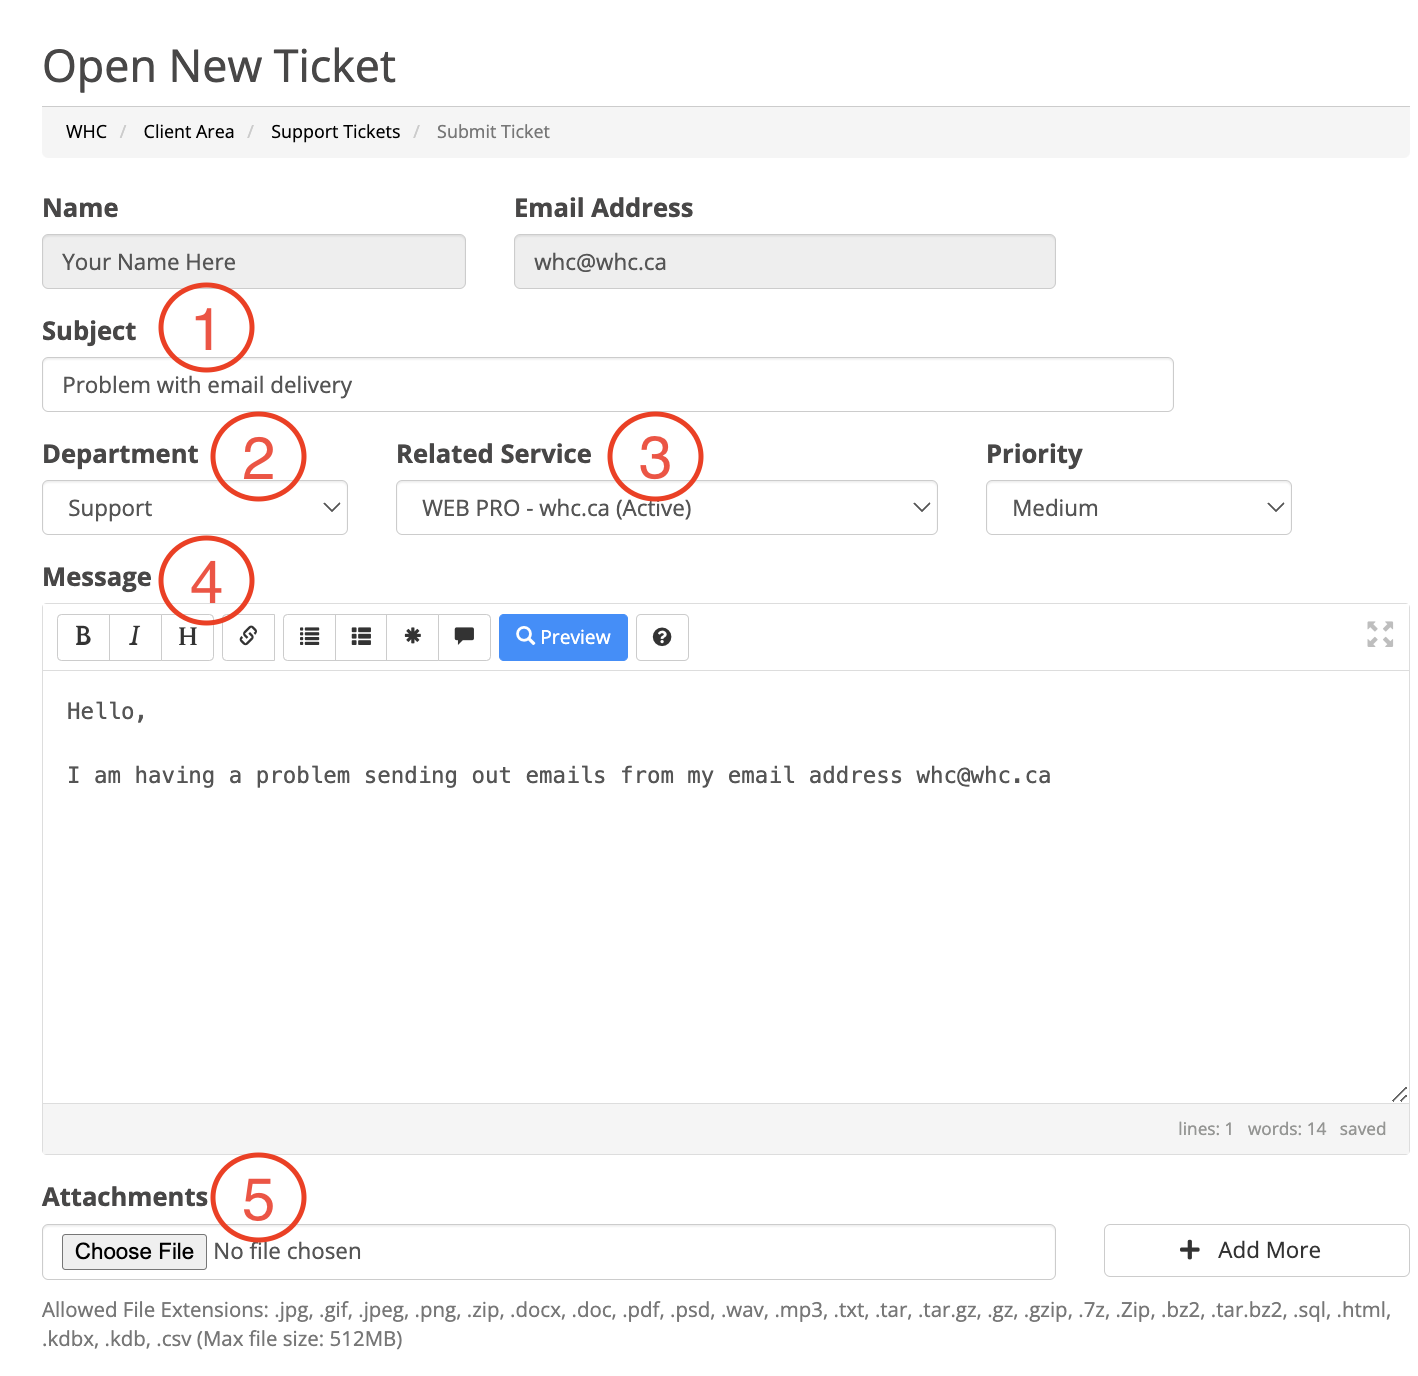
- Double-check that everything is filled out correctly.
- Click Submit down at the bottom once done.
What’s next ?
Once the ticket has been submitted, you will get a confirmation message with a ticket ID. You can use the ticket number when reaching out to support via live chat or our phone line if you require any further assistance. You can also track the ticket status from the Support page on your WHC account (for the classic client area, tickets can be viewed under Support > View My Tickets).
