How to change DNS Records
These instructions will guide you through viewing or changing your DNS records.
The method may vary depending on the services you have with WHC:
- I have a Hosting Service or Email service
- I have a Domain Name only (not connected to a WHC hosting service)
- I have a Reseller Account
- I have a Dedicated or Cloud Server
If You Have a Hosting or Email Service with WHC
Accessing DNS Records
- Sign into the WHC Client Area
- Click on Hosting & Websites (or Services in the old Client Area)
- Click on your Web Hosting service
- Go to your cPanel account

- Once inside cPanel, scroll down to Zone Editor, in the domain section, or type zone editor into the search bar. Open Zone Editor

- Find the domain you wish to modify and click Manage
- The screen you see will look something like this:

If You Have a Registered Domain With WHC With No Linked Service
Accessing DNS Records
- Sign in to the WHC Client Area
- Click on Domains
- Click on the domain you wish to work on
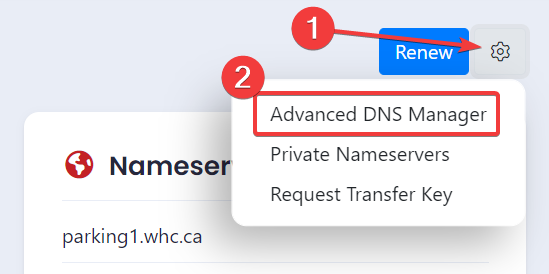
- Click on the settings 'gear' icon on the top right side, then click Advanced DNS Manager
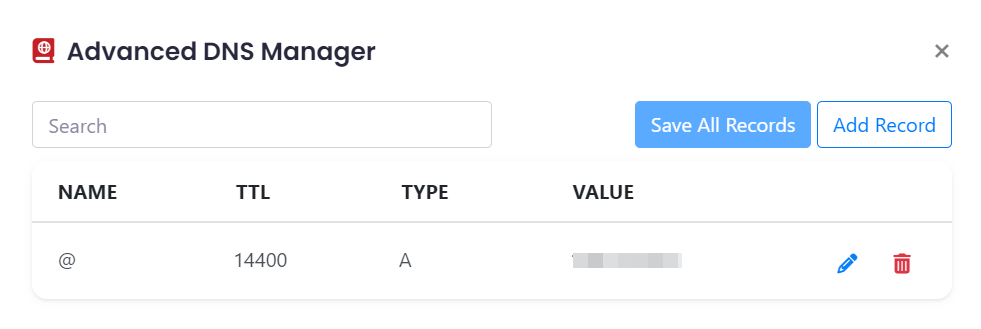
- The screen you see will look something like this:
- For more information, see How to update the DNS Records (A, AAAA, CNAME, MX, TXT, SRV) for my domain.
If you're using the old client area:
- Sign in to the WHC Client Area
- Click on Domains
- Click on the domain you wish to work on
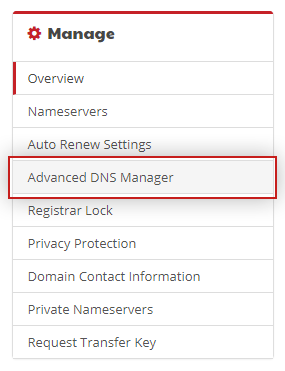
- Go to Advanced DNS Manager on the left sidebar
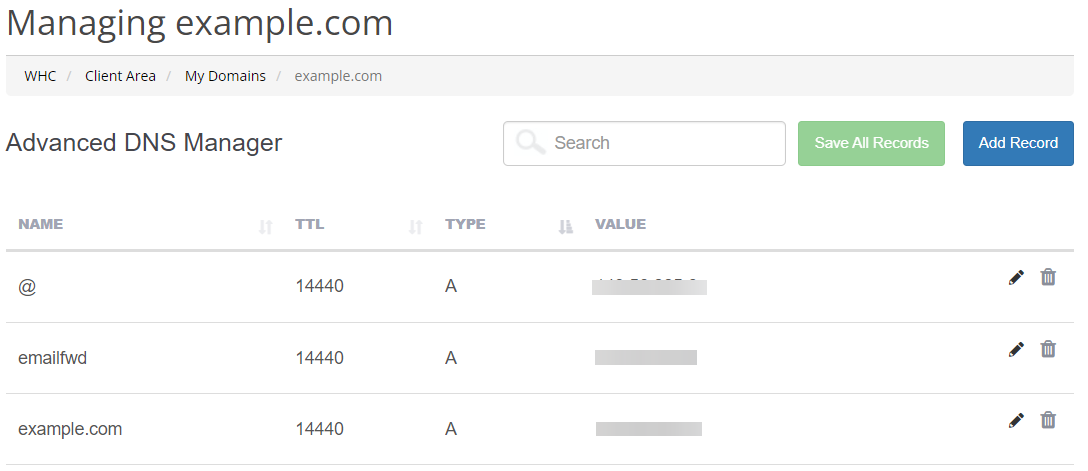
- The screen you see will look something like this:
- For more information, see How to update the DNS Records (A, AAAA, CNAME, MX, TXT, SRV) for my domain.
If You Have a Reseller Account with WHC
Accessing DNS Records
- Sign in to the WHC Client Area
- Click on Hosting & Websites (or Services in the old Client Area)
- Click on your Reseller Hosting account
To modify DNS on your reseller account's primary domain
- Go to cPanel if you wish to modify the zones for the reseller account

- Once inside cPanel, scroll down to Zone Editor, in the domain section, or type zone editor into the search bar. Open Zone Editor

- Find the domain you wish to modify and click Manage
- The screen you see will look something like this:

To modify the DNS records of a client's domain
- Go to Web Hosting Manager (WHM) and click the Launch button (you may need to enter your WHM Username and Password)

- Once inside type Zone into the search bar. Open Edit DNS Zone
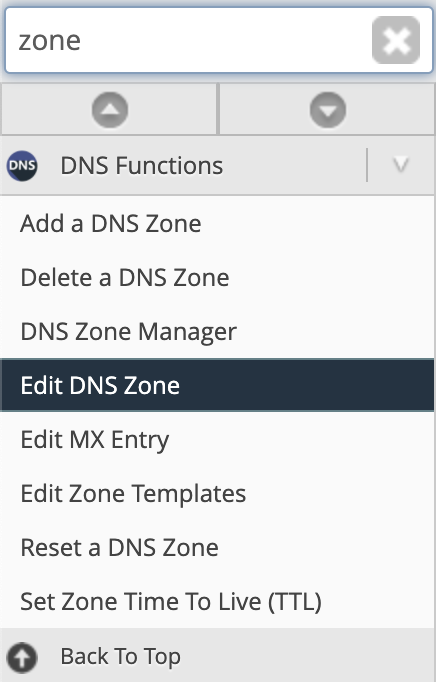
- Find the domain you wish to modify and click Edit
- Make the changes required in the Edit DNS Zone screen and click Save
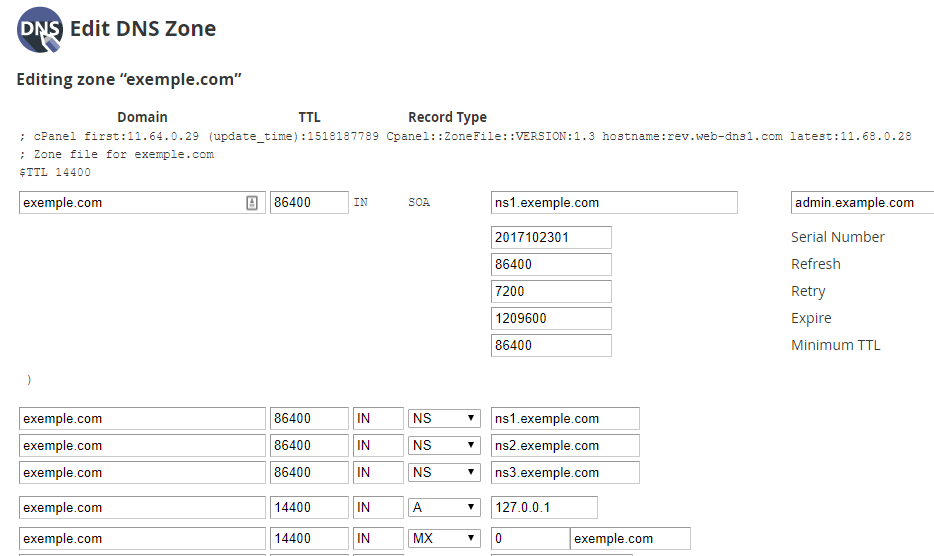
- Go to cPanel if you wish to modify the zones for the reseller account
If You Have a Cloud or Dedicated Server with WHC
Tip
If your domain is not yet linked to your Cloud or Dedicated server, we recommend that you check this article.Accessing DNS Records
If your your domain is using personalized or private nameservers, please follow these steps down below. If you're using Parking nameservers instead, then follow the instructions mentioned earlier in this article.
- Sign in to the WHC Client Area
- Click on Services
- Click on your Dedicated or Cloud service
- Go to Web Hosting Manager (WHM), then click the Launch button. Enter your WHM Username and Password

- Once inside type Zone into the search bar. Open Edit DNS Zone

- Find the domain you wish to modify and click Edit
- Make the changes you require on the Edit DNS Zone screen then click Save

- The changes made should propagate within a few hours.

