How to change DNS Records
These instructions will guide you through viewing or changing your DNS records.
The method may vary depending on the services you have with WHC:
- I have an Hosting Service or email
- I have a Domain Name only (not connected to a WHC hosting service)
- I have a Reseller Account
- I have a Dedicated or Cloud Server
If You Have a Hosting or Email Service with WHC
Accessing DNS Records
- Sign into the WHC Client Area
- Click on Hosting & Websites (or Services in the old Client Area)
- Click on your Web Hosting service
- Go to your cPanel account

- Once inside cPanel, scroll down to Zone Editor, in the domain section, or type zone editor into the search bar. Open Zone Editor
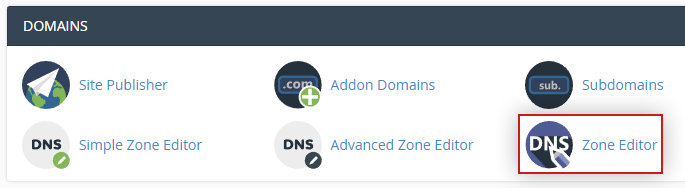
- Find the domain you wish to modify and click Manage
- The screen you see will look something like this:

If You Have a Registered Domain with WHC That Is Not Hosted with Us (or at all)
Accessing DNS Records
- Sign in to the WHC Client Area
- Click on Domains
- Click on the domain you wish to work on
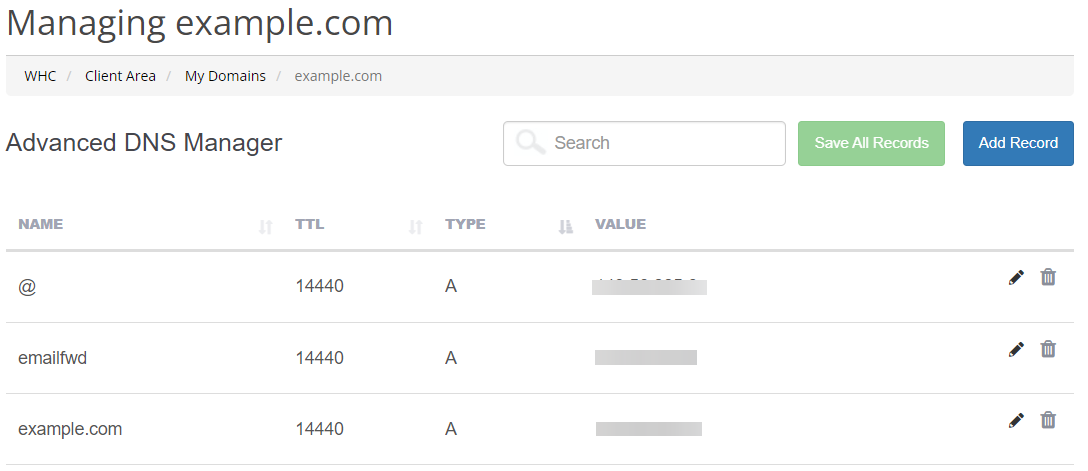
- Click on the settings 'gear' icon on the top right side, then click Advanced DNS Manager
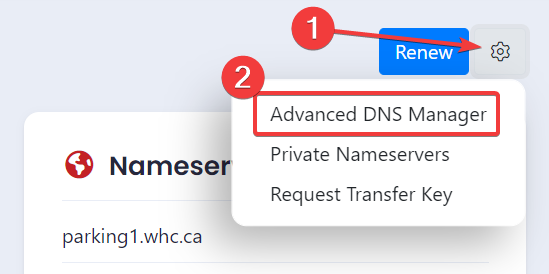
- The screen you see will look something like this:
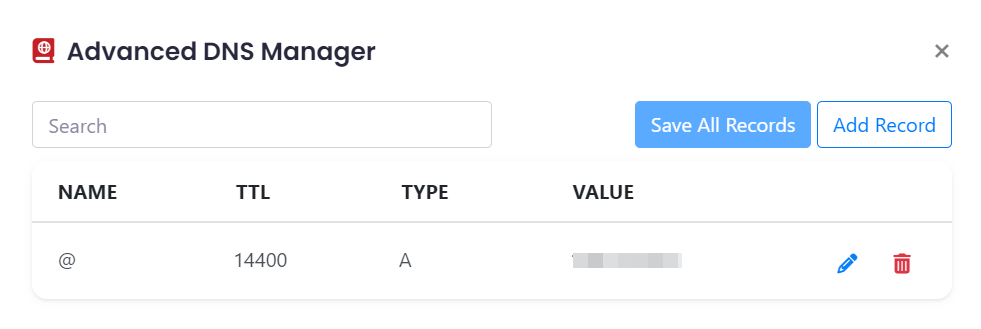
- For more information, see How to update the DNS Records (A, AAAA, CNAME, MX, TXT, SRV) for my domain.
If you're using the old client area:
- Sign in to the WHC Client Area
- Click on Domains
- Click on the domain you wish to work on
- Go to Advanced DNS Manager on the left sidebar
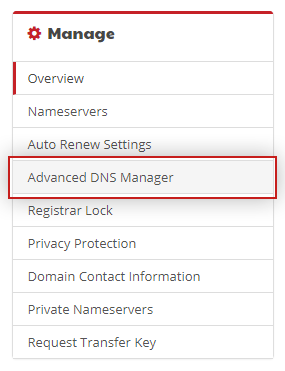
- The screen you see will look something like this:
- For more information, see How to update the DNS Records (A, AAAA, CNAME, MX, TXT, SRV) for my domain.
If You Have a Reseller Account with WHC
Accessing DNS Records
- Sign in to the WHC Client Area
- Click on Hosting & Websites (or Services in the old Client Area)
- Click on your Reseller Hosting account
To modify DNS on your reseller account's primary domain
- Go to cPanel if you wish to modify the zones for the reseller account

- Once inside cPanel, scroll down to Zone Editor, in the domain section, or type zone editor into the search bar. Open Zone Editor
- Find the domain you wish to modify and click Manage
- The screen you see will look something like this:
To modify the DNS records of a client's domain
- Go to Web Hosting Manager (WHM) and click the Launch button (you may need to enter your WHM Username and Password)

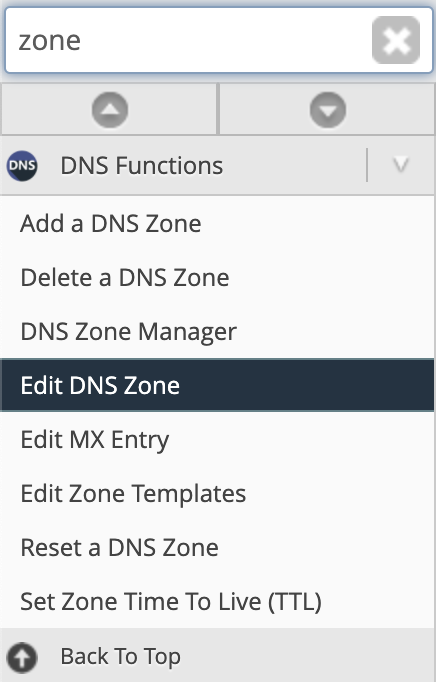
- Once inside type Zone into the search bar. Open Edit DNS Zone
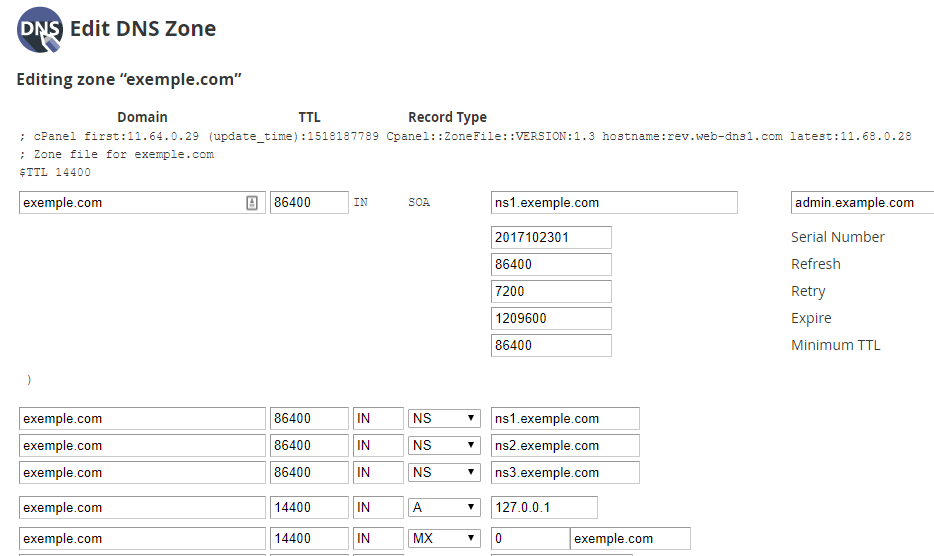
- Find the domain you wish to modify and click Edit
- Make the changes required in the Edit DNS Zone screen and click Save
- Go to cPanel if you wish to modify the zones for the reseller account
If You Have a Cloud or Dedicated Server with WHC
Accessing DNS Records
- Sign in to the WHC Client Area
- Click on Services
- Click on your Dedicated or Cloud service
- Go to Web Hosting Manager (WHM), then click the Launch button. Enter your WHM Username and Password
- Once inside type Zone into the search bar. Open Edit DNS Zone
- Find the domain you wish to modify and click Edit
- Make the changes you require on the Edit DNS Zone screen then click Save
- The changes made should propagate within a few hours.
