How to access and use SiteMojo
SiteMojo is a simple drag-and-drop website builder that can help you build a website, in no time, with little to no technical knowledge. This tool is included for free in all of WHC’s Web Hosting plans.
- How to access SiteMojo
- Access from cPanel
- How to create a website
- Select your theme
- Start with a blank page
- Choose a template
- Import an existing website
- Editor menu layout
- Modifying page elements
- Adding a new page
- Managing your settings
- Publishing your website
How to access SiteMojo
The SiteMojo interface can be accessed from your cPanel.
Access from cPanel
- Log in to your cPanel (See How to access cPanel)
- In the Popular Tools section, click SiteMojo Website Builder
How to create a website
Building your website is as easy as following the steps below.
Select your theme
Once you have successfully logged in, you’ll be presented with the following screen:
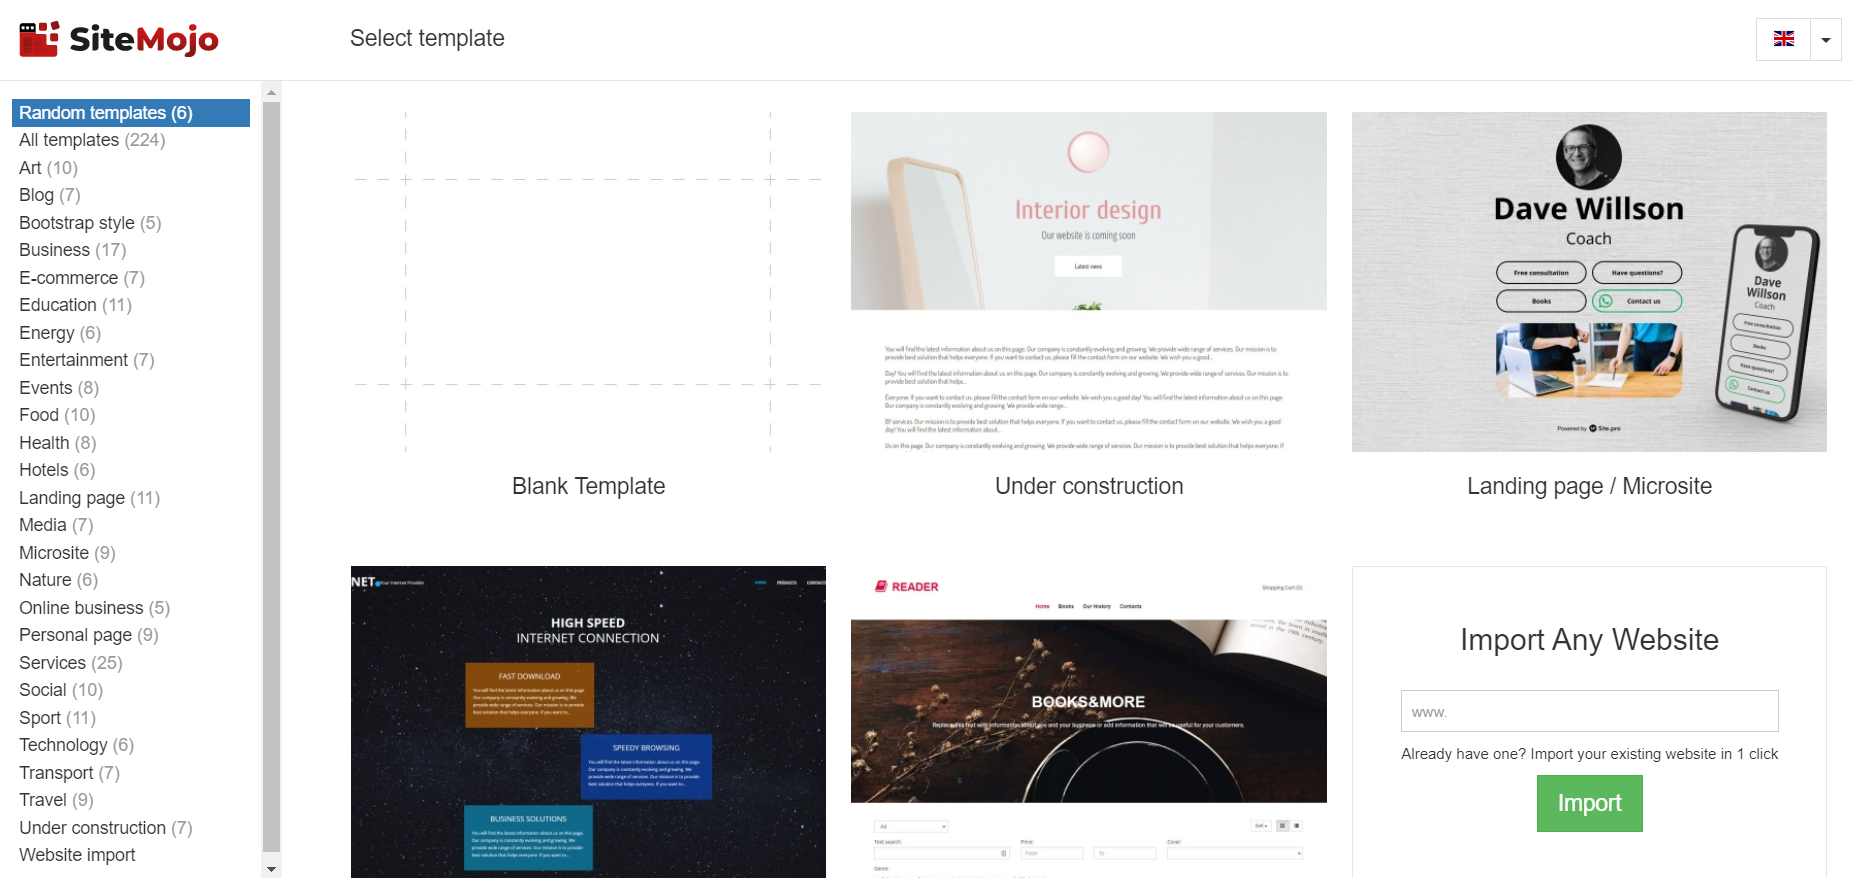
The following options are available:
- Start with a blank page
- Choose a template
- Import an existing website
Start with a blank page
If you wish to start with a completely blank page, select Blank Template. This is useful when you’re looking for greater control over the look and feel of your webpage, and are happy starting from scratch.
Choose a template
The most popular option is to build your website using one of the many pre-built templates.
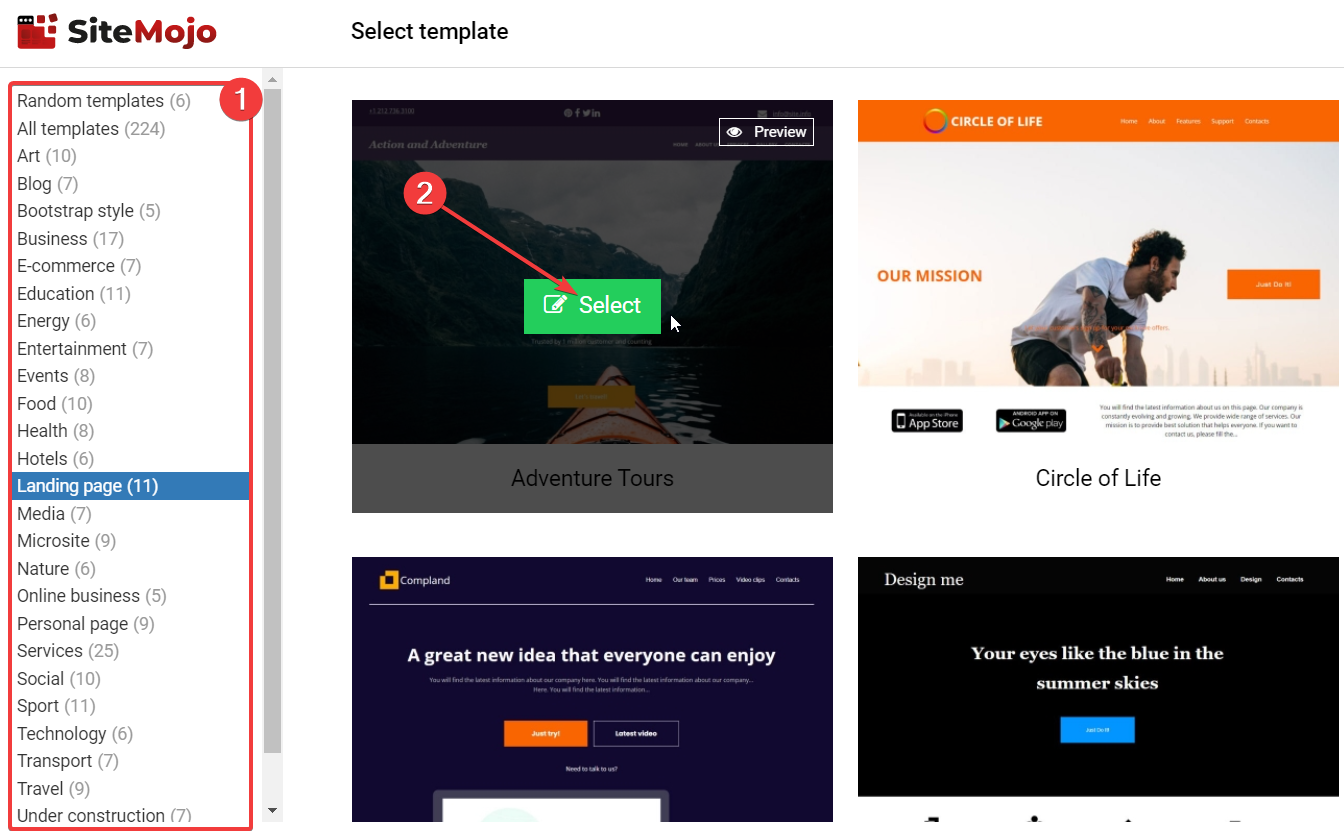
- Browse through the categories (in the left-side menu), to find the perfect template for your website
- Click Select on your desired template
Import an existing website
If you have an existing website, you may import it into the editor by choosing the Website import option. This feature allows you to import your existing website regardless of the platform (e.g. WordPress, Weebly, Wix etc) being used.
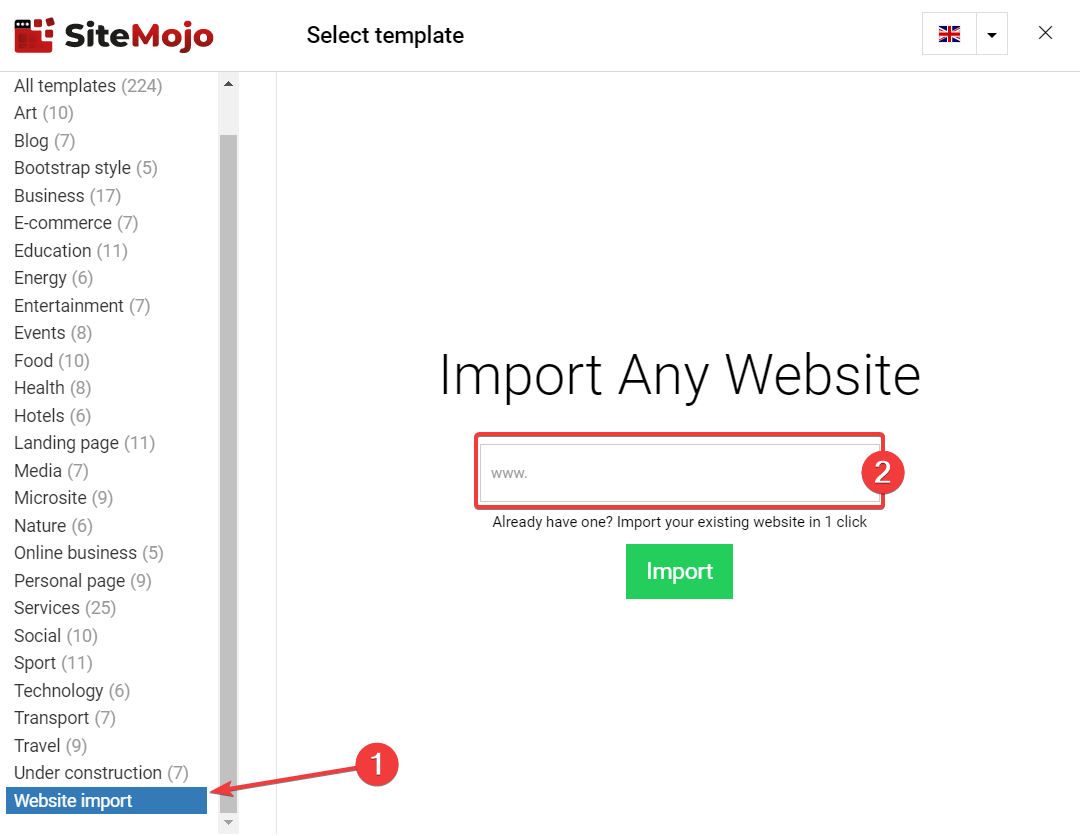
- Click Website import from the left-hand menu
- Enter your website address (e.g. www.example.com) into the text field, then click Import
Editor menu layout
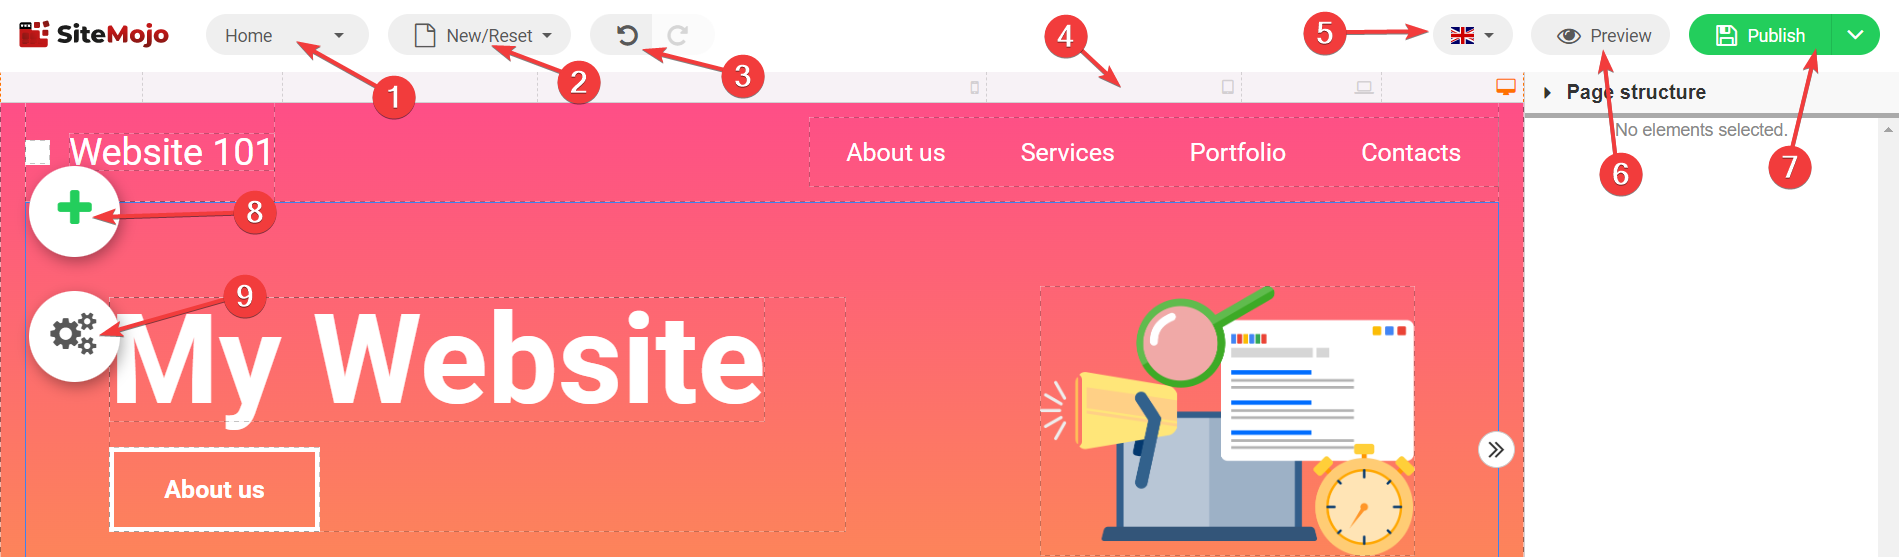
The menu layout is as follows:
1 - ’Home’ selection box: Select which page to navigate to in the editor
2 - ‘New/Reset’ selection box: Select a new template or reset the current template
3 - The ‘undo’ button: revert to your last change
4 - Select any device width along the bar to preview how your website will look on mobile devices
5 - Edit your website in a different language
6 - Preview your website in the browser (includes options for testing across different screen sizes)
7 - Select Publish to publish your website to the internet, or choose Save draft from the dropdown options to save your changes without publishing
8 - The ‘+’ menu adds new elements to your page
9 - The Settings menu
Modifying page elements
You can modify most elements on your website using the SiteMojo editor.
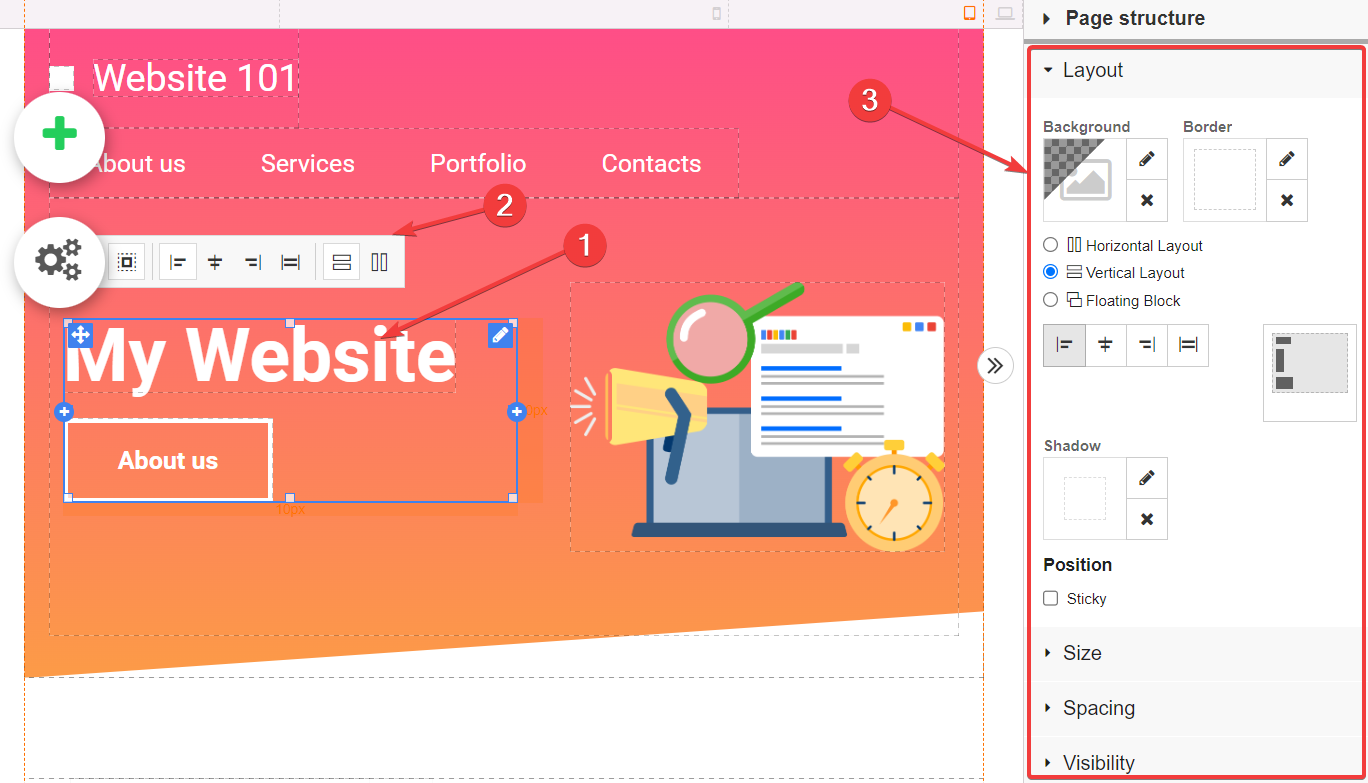
To modify an existing element, simply click on the element you want to edit (e.g. the My Website title). You can then freely edit the text, or choose from the edit options in either the popup menu or the page structure menu on the right-hand side. Any changes you make will be reflected right away in the editor!
To add a new element to your page, click the ‘+’ menu icon on the top-left corner of the page.
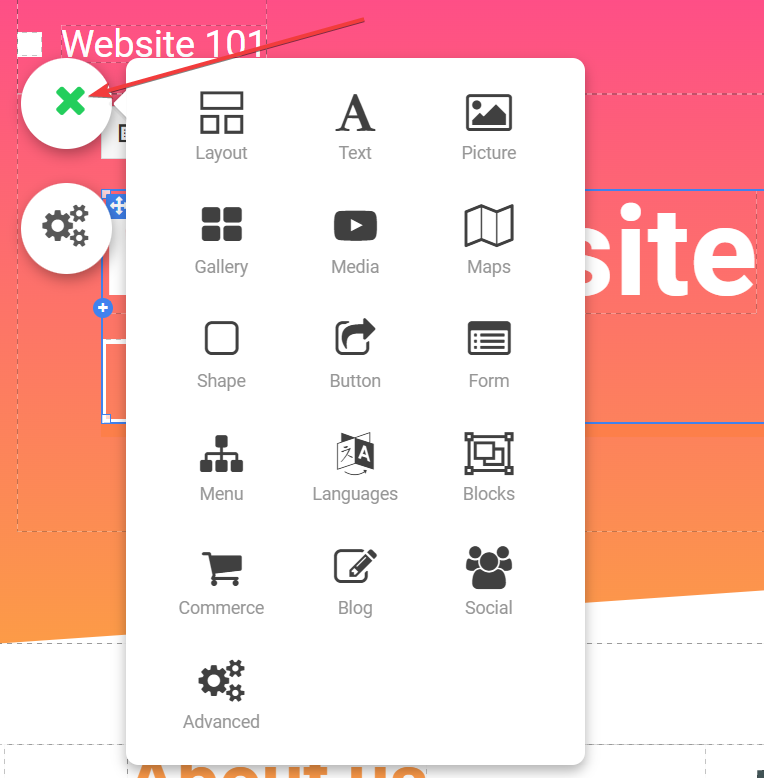
You can then choose which type of element you want to add, from the menu. See below for a summary of each option:
Layout: Choose from an endless variety of layouts to structure your website pages exactly as you please.
Text: Select from a multitude of different text styles to give your text a visual impact.
Picture: Add style to your website images by choosing from several picture format options. Also, use the icon library to give your icons that professional look.
Gallery: Have a lot of images? Display them using one of the available gallery layouts.
Media: Easily add media from popular websites such as YouTube, Instagram, Facebook, Vimeo, Spotify and more.
Maps: Add a custom Google map to your website with options to fit your theme style.
Shape: Add various shapes, and vertical and horizontal lines to add flair to your website pages.
Button: Choose from the various text and icon buttons to encourage your visitors to click and interact.
Form: Select from the pre-built contact forms (or create a blank form) to easily add this functionality to your webpage.
Menu: Choose the perfect menu layout for your website from a range of options.
Languages: Add language options to your website with support for over 50 languages.
Blocks: Choose from the library of pre-built blocks to truly build your website in a flash.
Commerce: Easily build an online store with a wide array of e-commerce templates, the ability to add a shopping cart to existing templates, and a range of accepted available payment options.
Blog: Build a functional blog with ease using one of the available layout options.
Social: Easily embed content from popular platforms (Instagram, Twitter, Facebook, Pinterest), and add ‘Like’ and ‘Share’ buttons to your pages or blog posts.
Advanced: Add features such as Google Calendar, AdSense, Countdown timers, Chat widgets, and much more!
Adding a new page
To add a new page to your website:
- From the Home menu, click on the dropdown arrow, then choose Edit
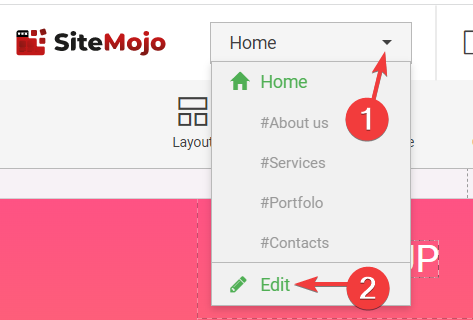
- Select New Page to create a new page
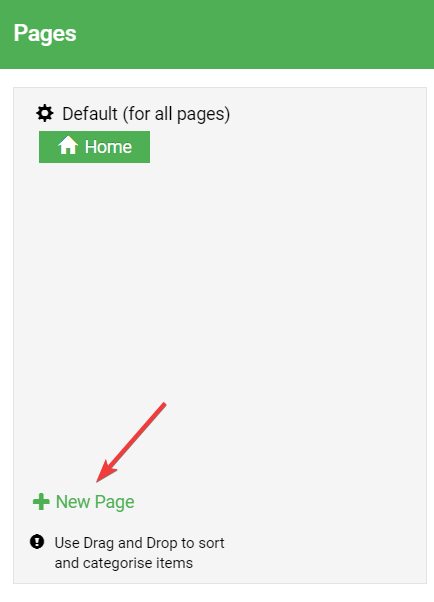
- Configure the page options:
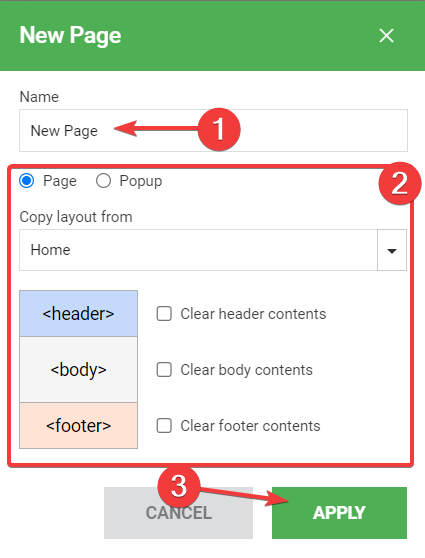
- Give your page a Name
- Optional settings:
- Set the page to open as a page or popup window
- Copy the layout from an existing page (e.g. your current home page)
- If desired, you can clear your header, body, or footer contents for further customization.
- When you are ready, click Apply to create the new page
Managing your settings
To manage your page settings, click the Settings icon:
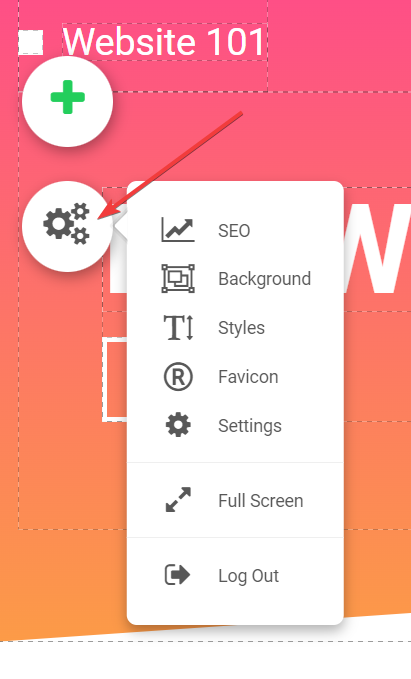
From here you can make adjustments to the following:
SEO: Set all your page SEO titles, descriptions, keywords, sitemaps and add any analytics tracking information (Google Analytics, Facebook pixel, etc) that you may have.
Background: Completely customize the background for your site.
Styles: Contains settings that allow you to edit the default font types and styles for text and links used throughout your site. Also contains advanced options such as default spacing between text.
Favicon: Allows you to upload a favicon (the icon that appears next to your site title, when it’s open in a web browser).
Settings: Further settings can be managed, including meta information, scripts, robots.txt, custom htaccess, cookie policy and more.
Full Screen: Displays your editor in full-screen mode.
Log out: To log out from the current session.
Publishing your website
To publish your site, click on the Publish button in the upper right-hand corner of the screen. This may take a few minutes to complete.
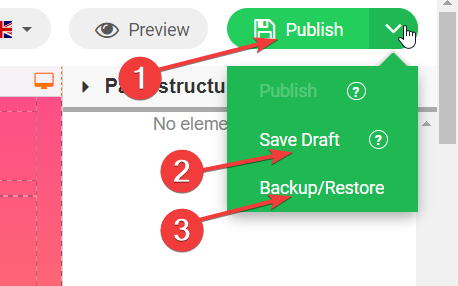
If you’re not ready to publish your site, you may choose Save Draft from the menu. This will save a working copy to continue editing later.
You can also use the Backup/Restore option to either backup your current changes, or restore from a previous backup.
Once your website is published, it will be immediately live & accessible online!
