How to Synchronize cPanel Calendars and Contacts
Are you looking to synchronize your calendars and contacts across all your devices?
This article provides instructions for how to set up cPanel calendars and contacts using the CalDAV and CardDAV internet standards.
- How to Find Your Setup Information
- Synchronizing Calendars on iOS/iPadOS devices
- Synchronizing Contacts on iOS/iPadOS devices
- Synchronizing Calendars on macOS
- Synchronizing Contacts on macOS
- Other Operating Systems
How to Find Your Setup Information
To locate your Calendar and Contacts configuration details:
- Log in to your WHC Client Area
- Click Services and, if you manage multiple services with WHC, click on the hosting account you wish to access
- Click on Go to cPanel
- Scroll down to the Email section, then click on Calendars and Contacts
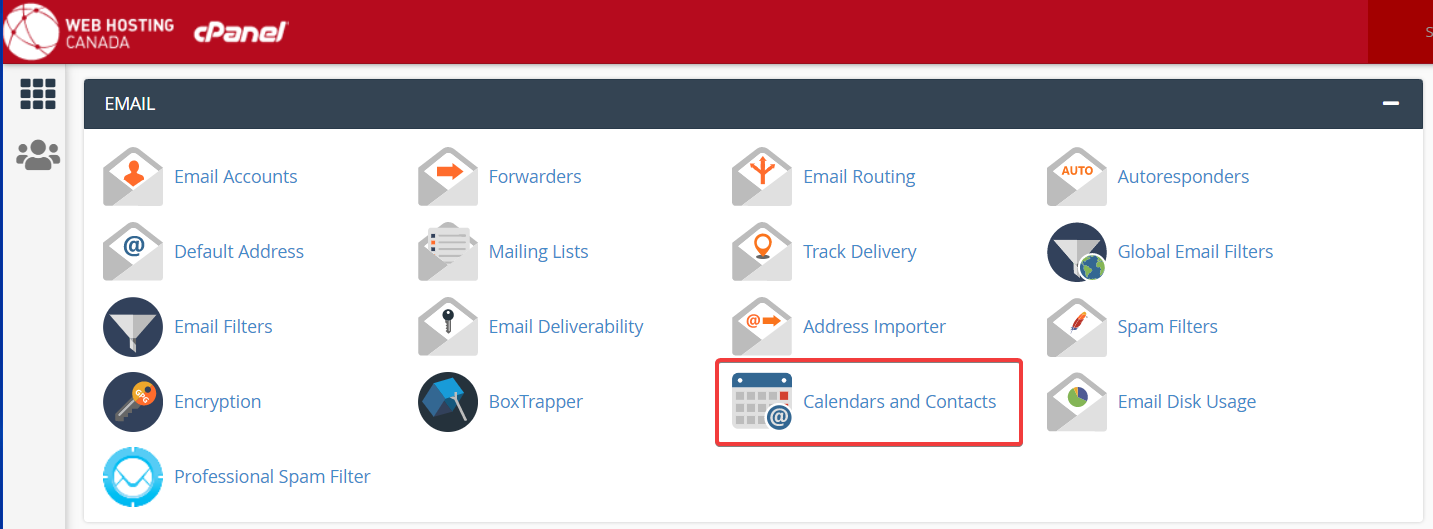
Scroll down to find your setup information, it will display the following:
- Username
- Password
- Server URL
- Alternate Server URL

Synchronizing Calendars on iOS/iPadOS devices
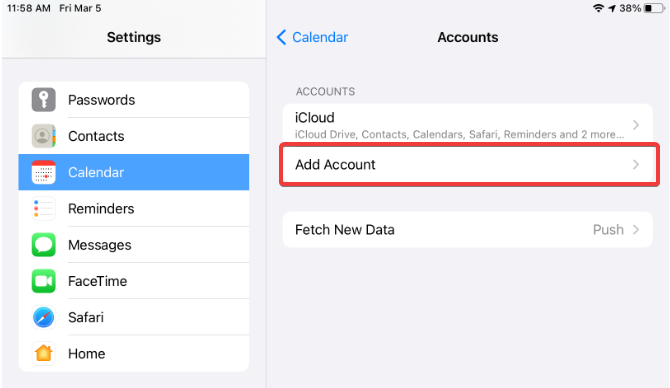
From the Settings menu, select Calendar, then Accounts.

Choose Add Account.
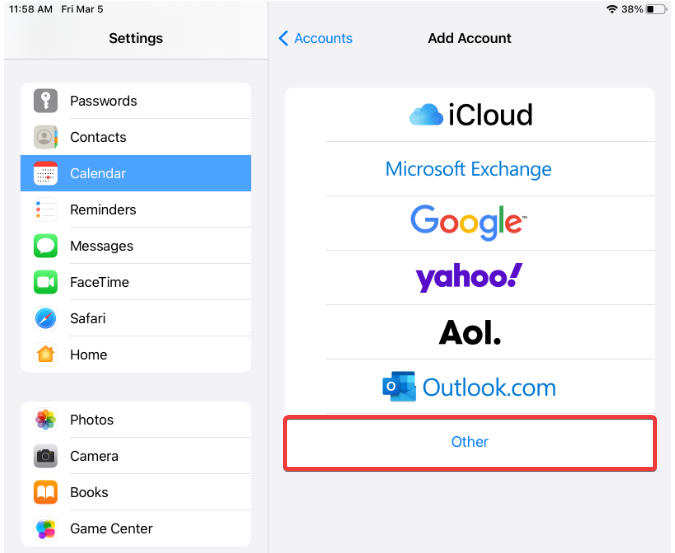
Select Other.
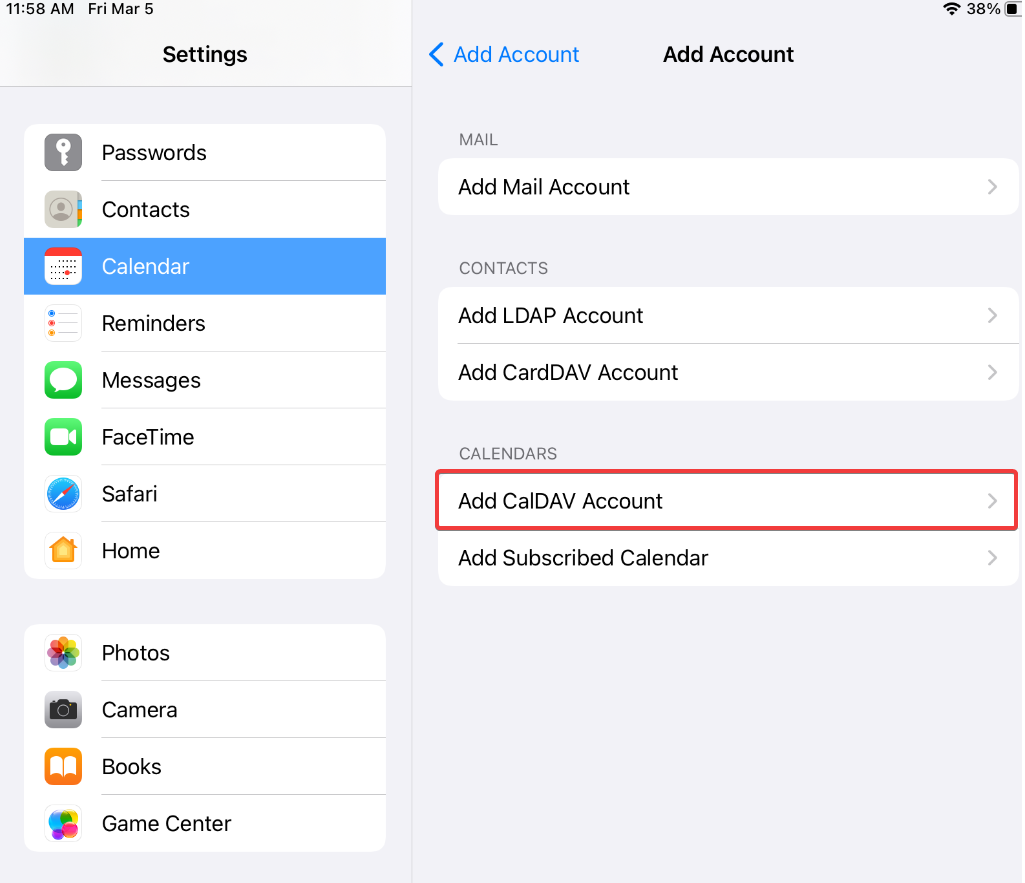
Choose Add CalDAV Account, under the Calendars section.
Enter your information (see: How to Find Your Setup Information).
- Server: enter your server URL (e.g. mail.example.com:2080). Note: It is required to add port 2080 at the end of your hostname, in order for the procedure to work
- Username: add your username
- Password: add your email password
- Description: add a label for your account
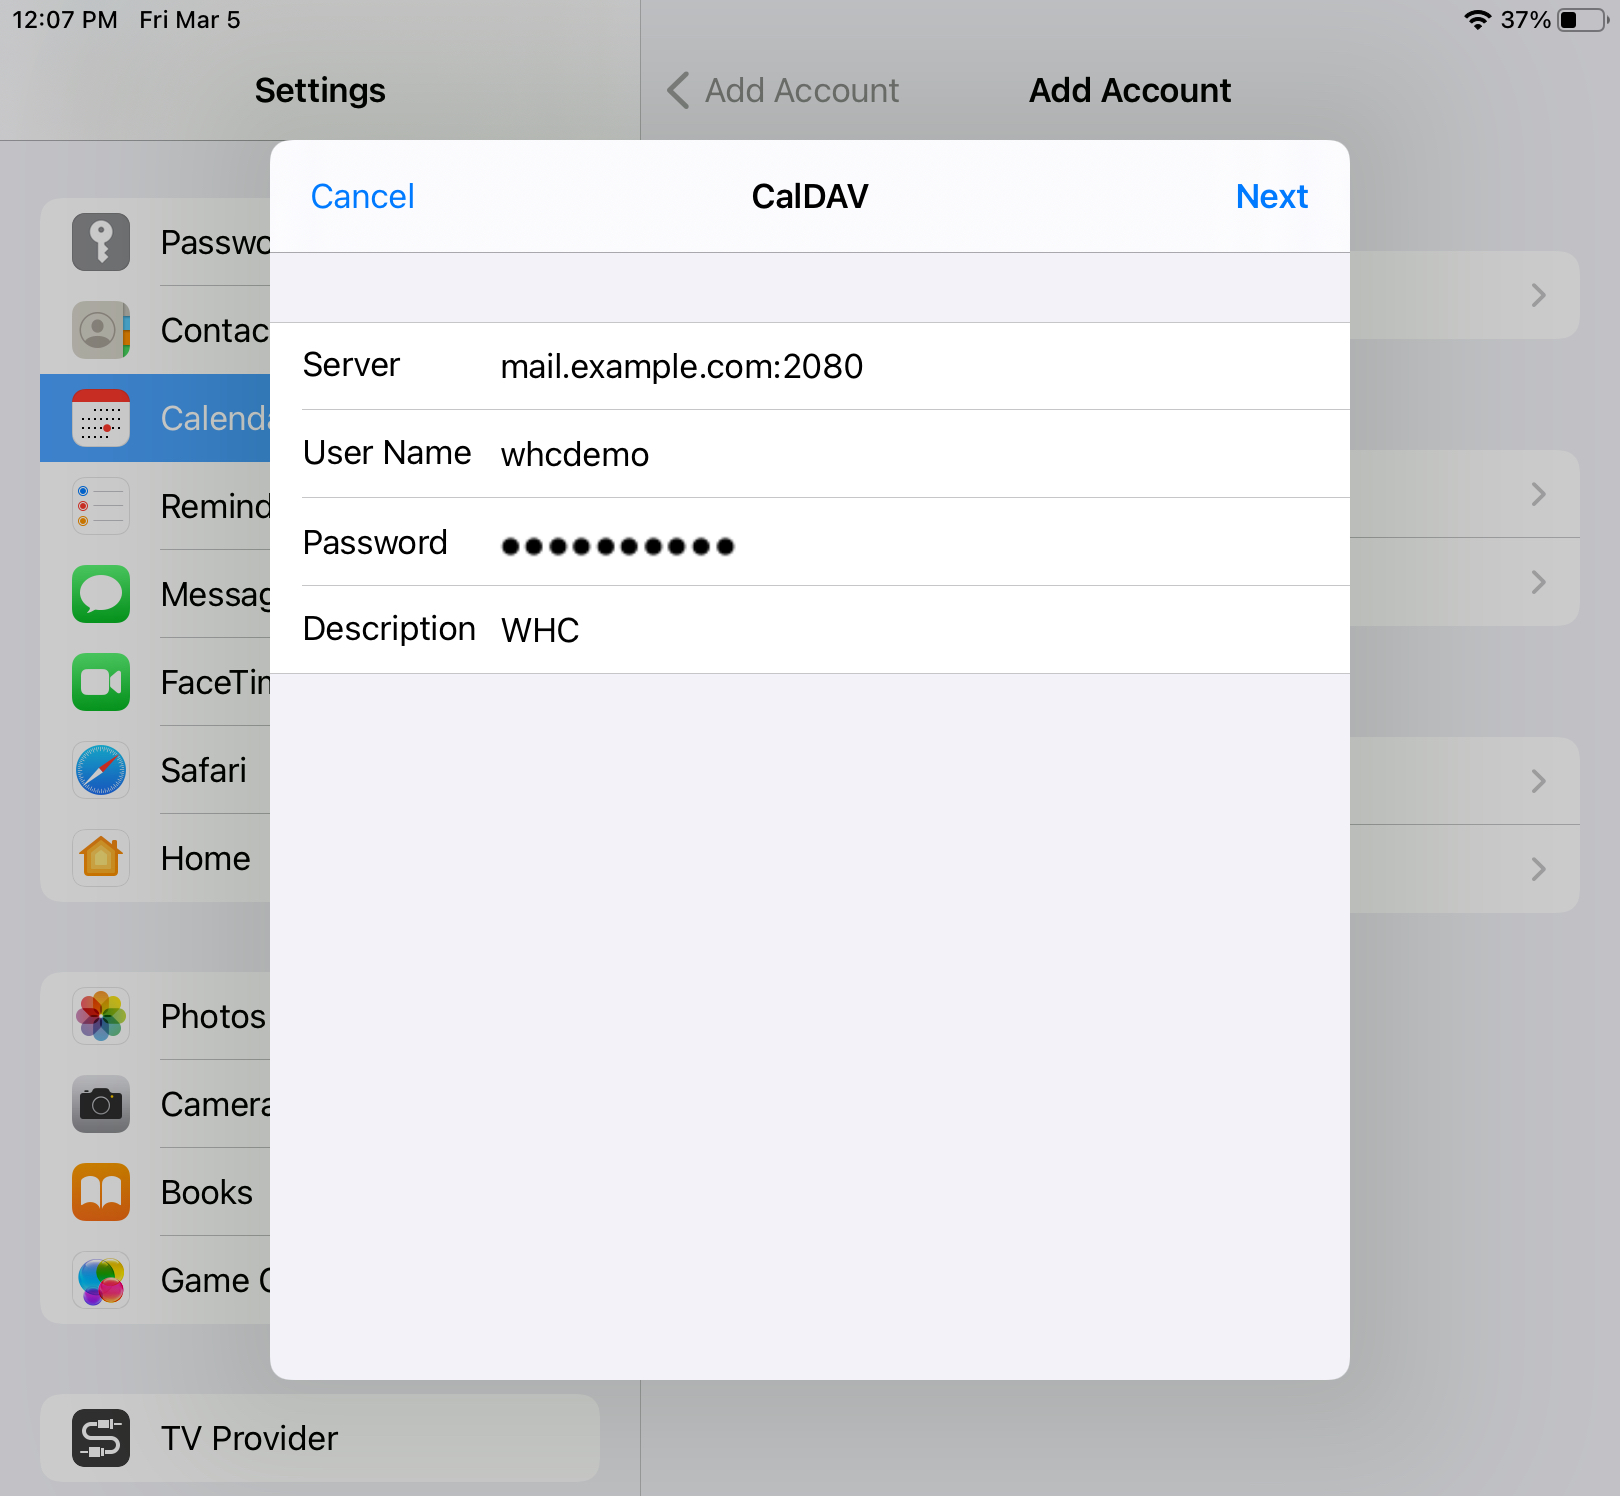
Choose Next. Confirm the Calendars option slider is set to active, then select Save.
And you're done! All calendar events in your hosting account will now be visible via the Calendar app on your device.
Synchronizing Contacts on iOS/iPadOS devices
To synchronize your contacts, open Settings and choose Calendar, then Accounts.
Choose Add Account.
Select Other.
Choose Add CardDAV Account, under the Contacts section.
Enter your information (see: How to Find Your Setup Information).
- Server: enter your server URL (e.g. mail.example.com:2080). Note: It is required to add port 2080 at the end of your hostname, in order for the procedure to work
- Username: add your username
- Password: add your email password
- Description: add a label for your account
Choose Next.
All contacts from your hosting account will now be added to the Contacts app on your device.
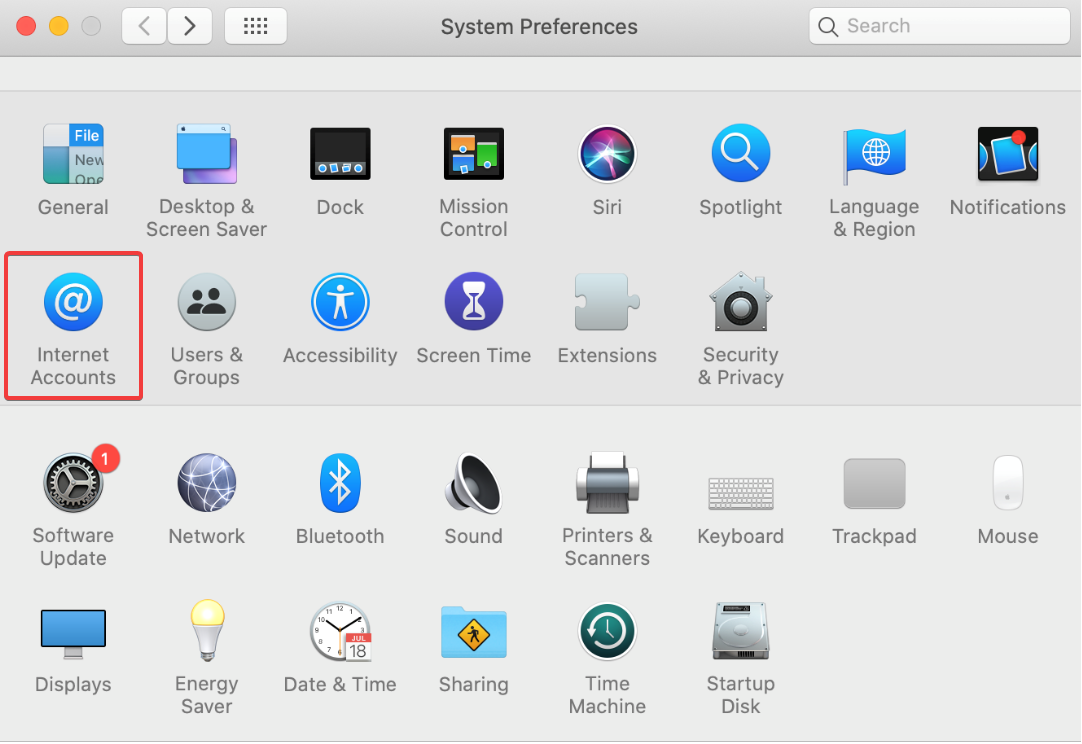
Synchronizing Calendars on macOS
From the Apple menu, open System Preferences and select Internet Accounts.
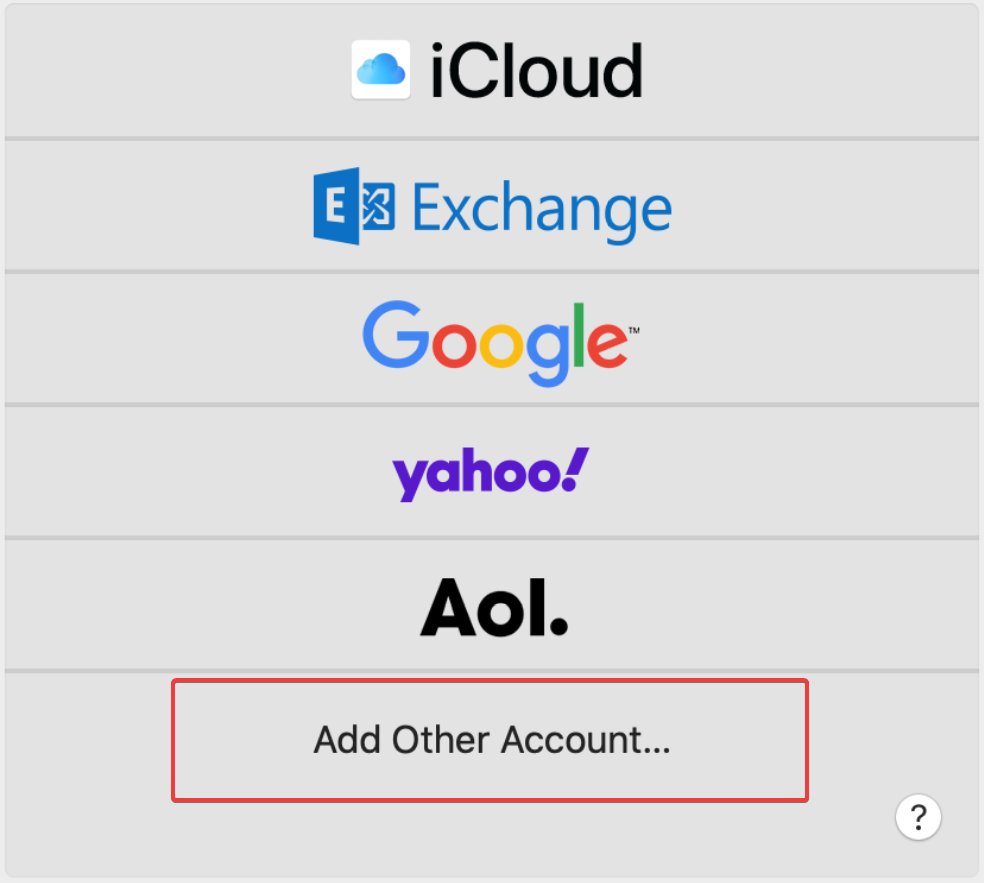
Click Add Other Account.
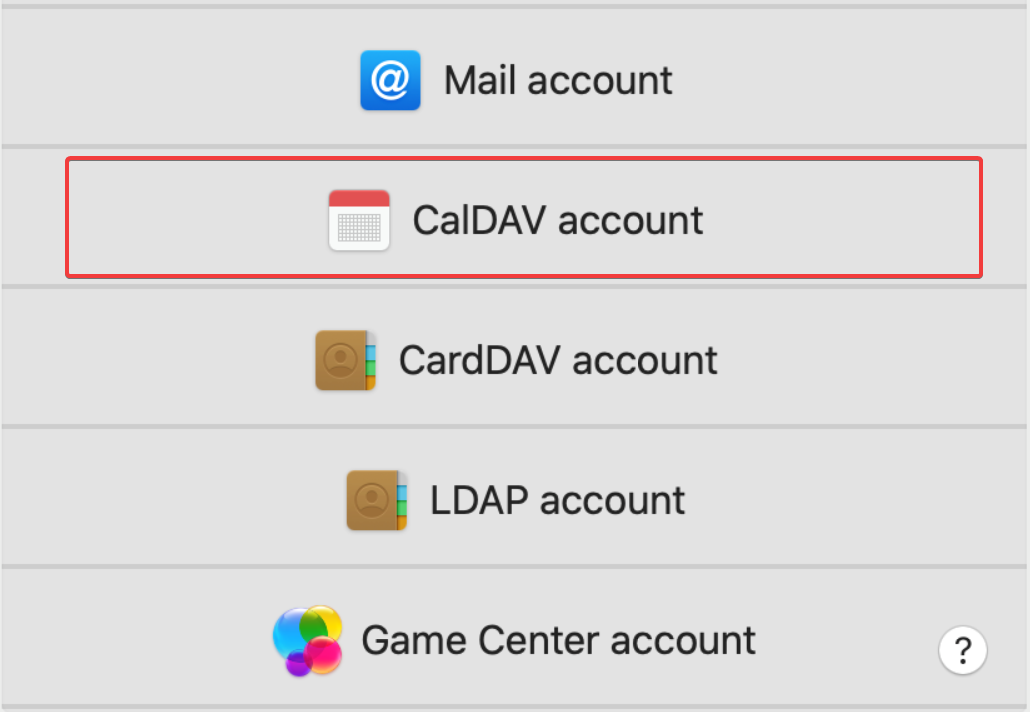
Select CalDAV account.
Enter your information (see: How to Find Your Setup Information).
- Account Type: choose Manual
- User Name: add your username
- Password: add your email password
- Server Address: enter your server URL (e.g. mail.example.com:2080). Note: It is required to add port 2080 at the end of your hostname, in order for the procedure to work
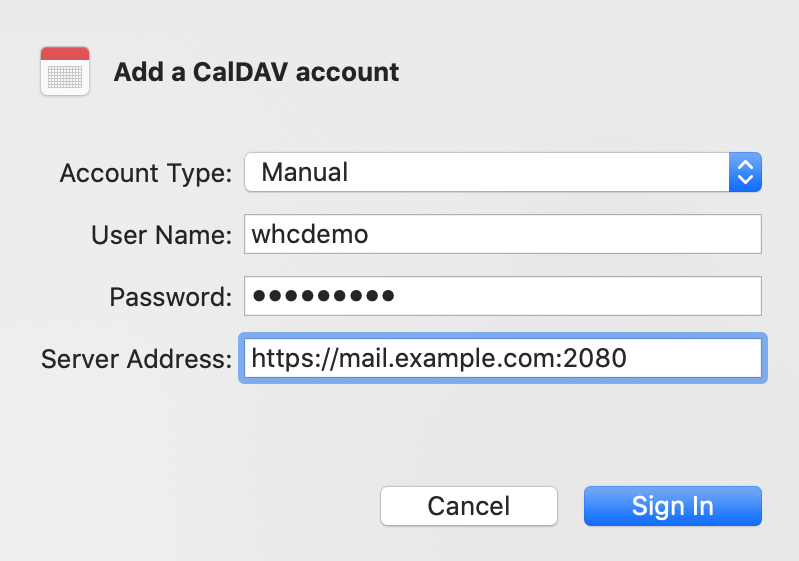
Click the Sign In button.
And you're done! All calendar events in your hosting account will now be visible via the Calendar app on your device.
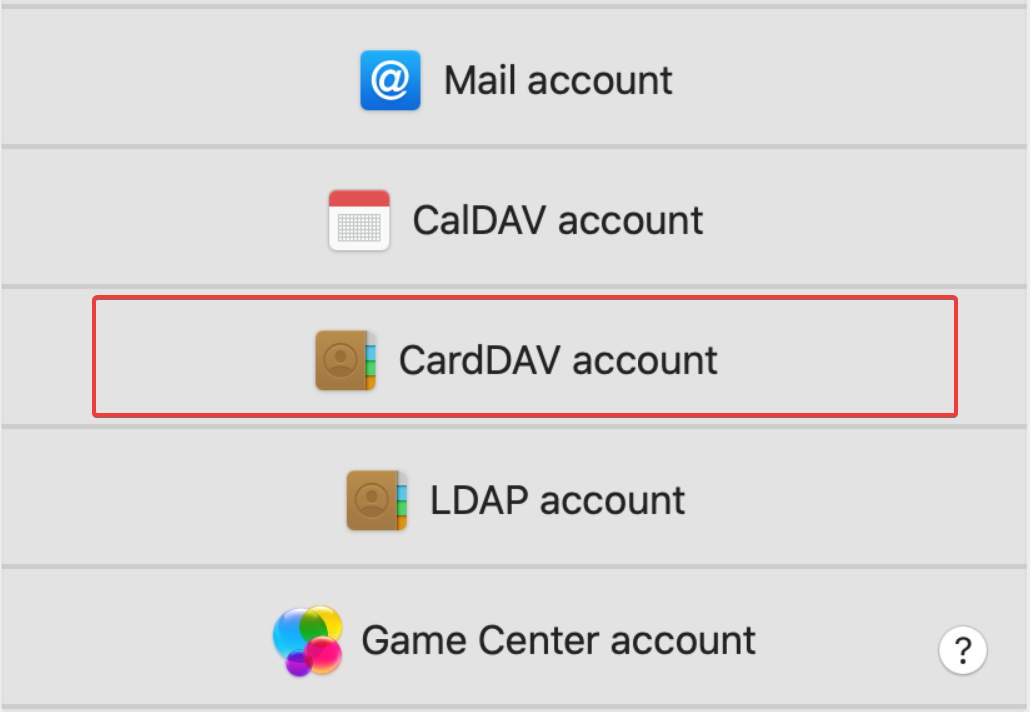
Synchronizing Contacts on macOS
From the Apple menu, open System Preferences and select Internet Accounts.
Click Add Other Account.
Select CardDAV account.
Enter your information (see: How to Find Your Setup Information).
- Account Type: choose Manual
- User Name: add your username
- Password: add your email password
- Server Address: enter your server URL (e.g. mail.example.com:2080). Note: It is required to add port 2080 at the end of your hostname, in order for the procedure to work
Click the Sign In button.
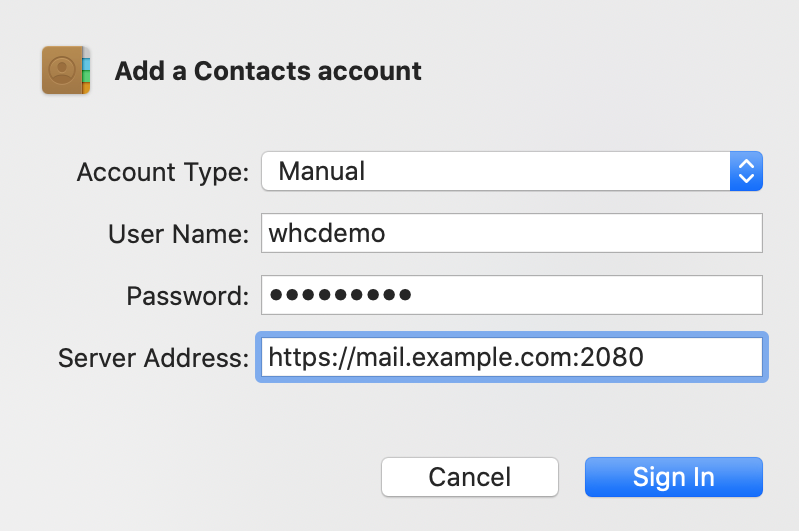
All contacts from your hosting account will now be added to the Contacts app on your device.
Other Operating Systems
CalDAV and CardDAV are natively supported on all Apple devices. If you use another operating system, it is likely that cPanel calendar and contact synchronization will require the use of a third party client. Follow the procedure as specified by your operating system (or mail client), using your setup information, see: How to Find Your Setup Information.
