How to Restore File Backups using JetBackup 4
Are you using JetBackup 5? Please see: How to restore a Home Directory or specific files using JetBackup 5.
This article describes how to restore a folder or an individual file account from a WHC backup.
Learn more about which backup restoration approach is best for you.
The JetBackup Restoration tool is available by default with Web Hosting and Reseller Hosting plans. If you are using other services, this tool may not be available to you. Contact our support team for additional information.


How to Restore Folders
- Log in to your cPanel
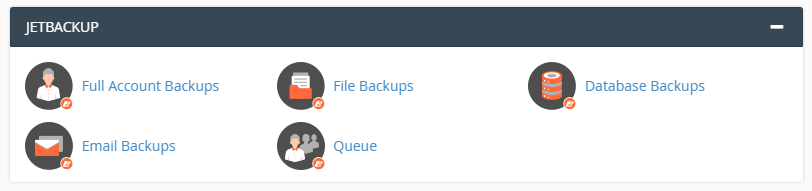
- Scroll down to the JetBackup section and then click on File Backups
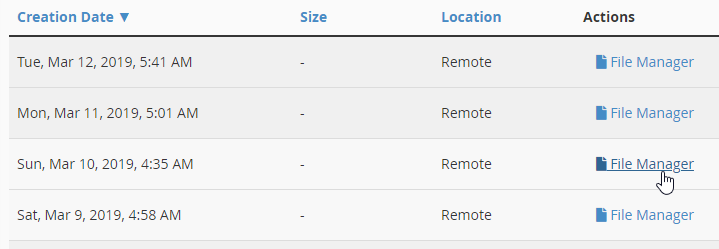
- Choose the desired date and click on the File Manager link
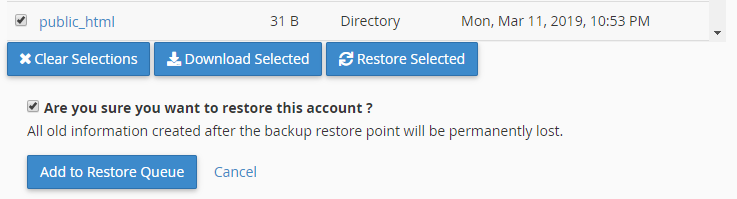
- Select the desired folder you wish to restore (i.e., public_html)
- Click on the button Restore Selected
- Tick the box Are you sure you want to restore this account?
- Click on Add to Restore Queue button
- Watch the progress on the right side, in the Restores section
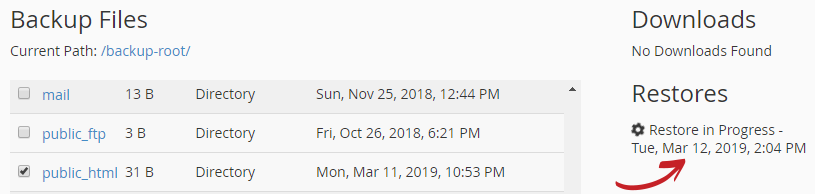
- Wait the restoration job to finish.
The queue status “Completed” means that the restauration has been successful. If you get the queue status “Failed” you may try another date, or you may contact our Support.
How to Restore Individual Files
- Log in to your cPanel
- Scroll down to the JetBackup section and then click on File Backups
- Choose the desired date and click on the File Manager link
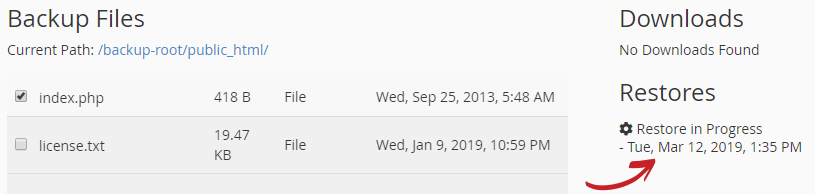
- Select the desired files you wish to restore (i.e., index.php)
- Click on the button Restore Selected
- Tick the box Are you sure you want to restore this account?
- Click on Add to Restore Queue button
- Watch the progress on the right side, in the Restores section.
- Wait the restoration job to finish.
The queue status “Completed” means that the restauration has been successful. If you get the queue status “Failed” you may try another date, or you may contact our Support.
